Flutter Food Delivery App | E-commerce for iOS and Android | Shopping App With Backend & Restful Api. It also includes delivery boy app.
Part 1 Shopping App
Part 2 Shopping App
Part 3 Shopping App
Part 4 Shopping App
Part 5 Shopping App
Part 6 Shopping App
Part 7 Shopping App
Part 8 Shopping App
Once you know the architecture of this, you would be able to use it for any kind of e-commerce or shopping with backend. All you need to do is change the pictures and products' names.
State management
This e-commerce app is based on flutter Getx Package. We used Getx package to manage the state and routing of the app. We have also used Getx for api client.
Getx is a great package for managing your app states, routes and http client. It does more than that. If you are trying to build a complex mobile or web app using flutter, Getx would be your best choice. And it's also beginners friendly reactive state management app package.
We used Getx for products display, maintaining the state of the shopping cart, profile page, google map and many other features of this e-commerce app or shopping app.
Backend
We have used Laravel for building the backend of this app. We used the same framework for building Restful Api for the app. Laravel is the most popular web application framework both for backend and api building. Backend shows users' orders, total orders, users' info, payment info etc.
Unlock the code here
All the downloadable code is Flutter 3.4 version. I have also included installation guide so that you would be able to deploy locally and in Live server as well. Code level 1, code level 2 and commercial license includes different features. Most features are in commercial license. Here you should go and do complete customization of your app.
Resources on Youtube
Patreon link for downloading the code personal license (code level 1)
Buy me coffee link for downloading personal license (code level 1)
Code leve 1 includes
1. all the pages listed below with screenshot
2. backend
3. latest code flutter 3.10.0 version
(Total sale : 320 life time, code update last on 2024-4-26)
Patreon link for downloading the code personal license (code level 2)
Buy me coffee link for downloading the personal license (code level 2)
Code level 2 includes code level 1 as well as more features like
1. Google search address and save
2. Updating profile (including uploading profile photo and change)
3. Search products
4. It includes internet connection checking as well
5. latest code flutter 3.10.0 version
(Total sale : 215 life time, code last updated on 2024-4-18)
Patreon link for downloading the code commercial license
Buy me coffee link for downloading the code commercial licence
Commercial license includes everything and any future features.
Additional features for commercial licence
1. multiple lanugage support
2. firebase notification
3. local notification
4. firebase notification from backend
5. backend service zone set up
6. backend business set up
7. backend notification to delivery boy
8. phone number verification during registration
9. delivery boy app
10. latest code flutter 3.17 version
11. stripe payment
12. firebase OTP
13. added extra features for adding extra items on home page
14. added google login feature
15. added notification list page
16. added wishlist page(add and remove)
(Total sale : 159 life time, code updated last on 2025-02-05)
Facebook group
Join our facebook group for discussions if you encouter any problems (recommended)
Facebook page for discussing the problems you face
See the installation at the bottom
Backend code here
Install backend
E-commerce app documentation
Errors and Solutions E-commerce app Flutter
paypal: ab@dbestech.com pass: 12345678
You may use the above paypal account for testing payment. It's a sandbox account. This apk does not contain all the features of commercial license.
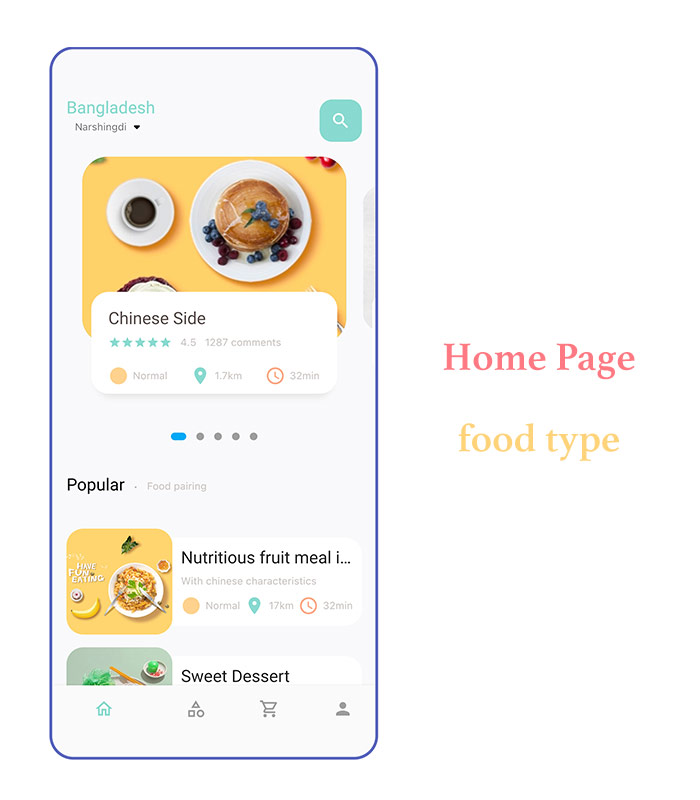
Home page
Home page displays food category. You can click on it and go to new page to view food and add to the cart.
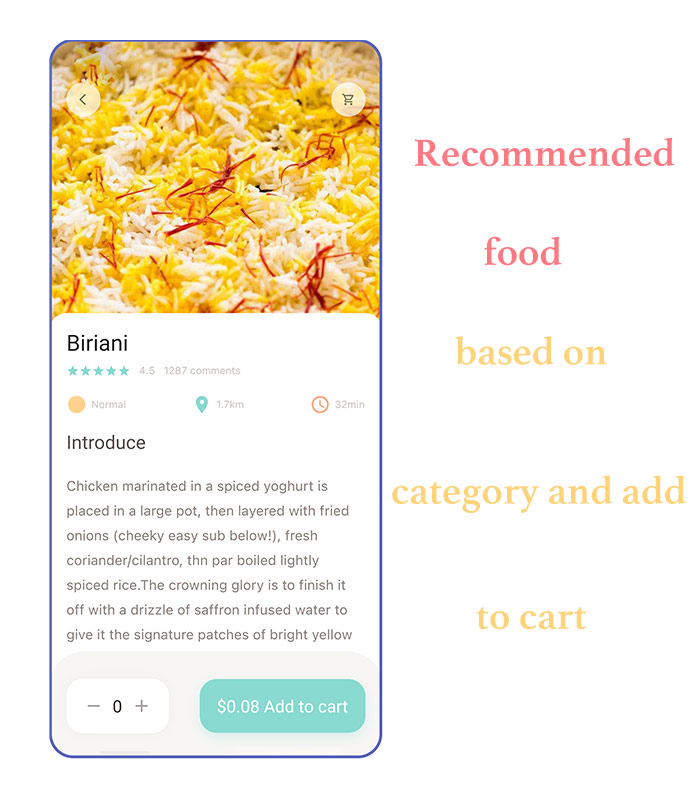
Recommended food page
This page comes from the home page and you can add the item to the cart. The introuduce text about food is collapsible. It also show the product price. And you can add items to the cart.
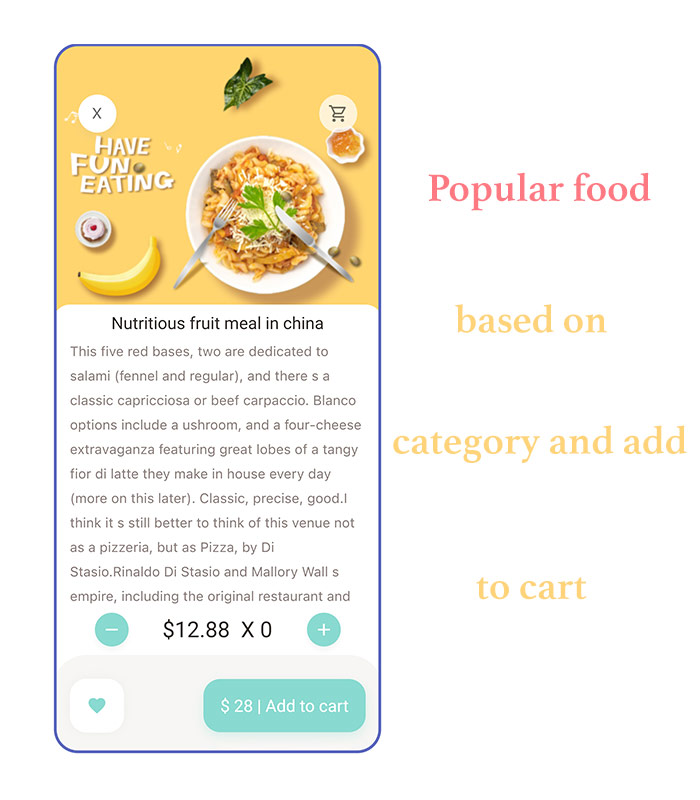
Popular food page
This page comes from the home page and you can add the item to the cart. The text about food is collapsible. It also show the product price. And you can add items to your shopping cart.
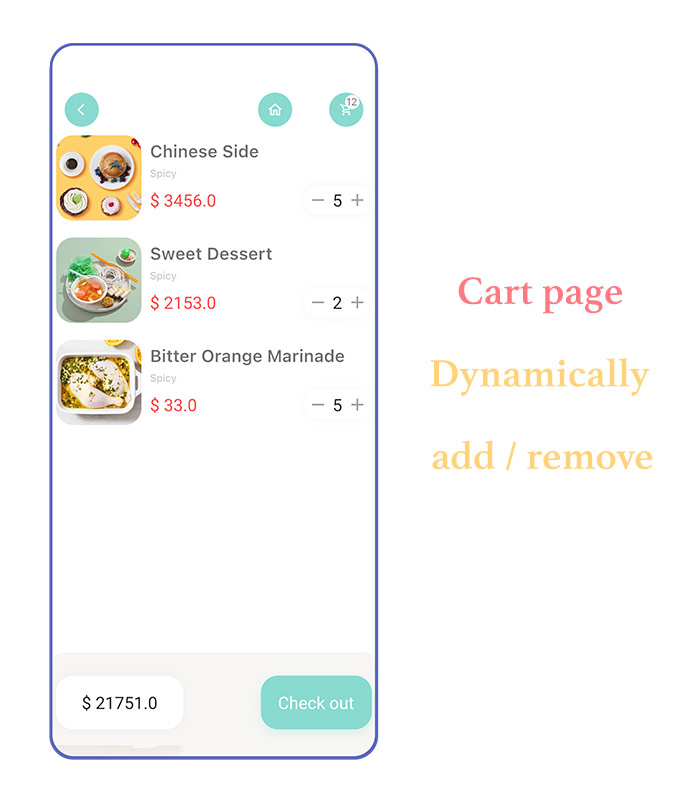
Cart page
In this page you place the order. You can also add or remove the items from the cart. As you add or remove you also see the total price changes. This page is dynamic since it removes and add items on user click.
Sign up page
Sign up using your credential. Once you sign up, the information is submitted to the database and a token for user is generated. This token is used for Authentication.
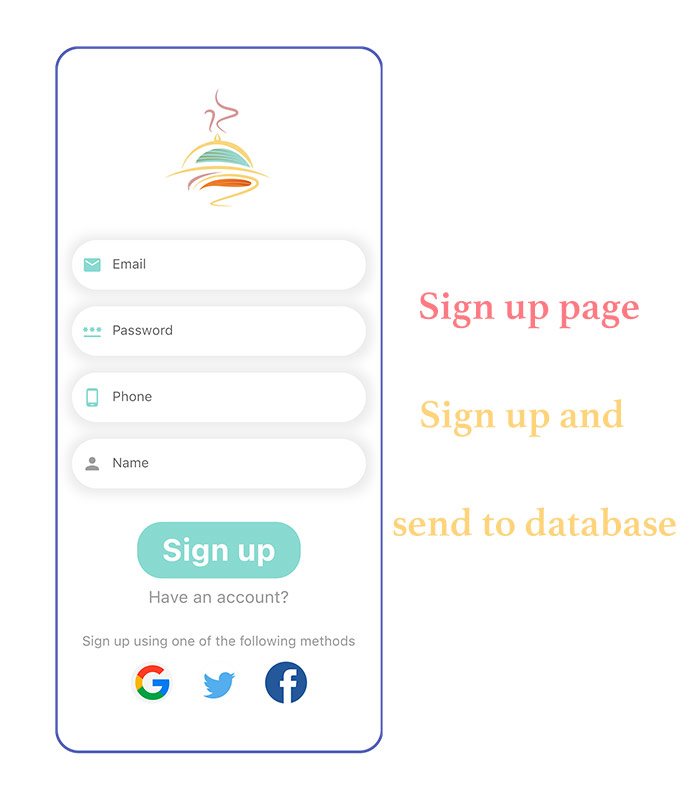
The commercial license includes phone number verification. Food commercial license registration UI is bit different.
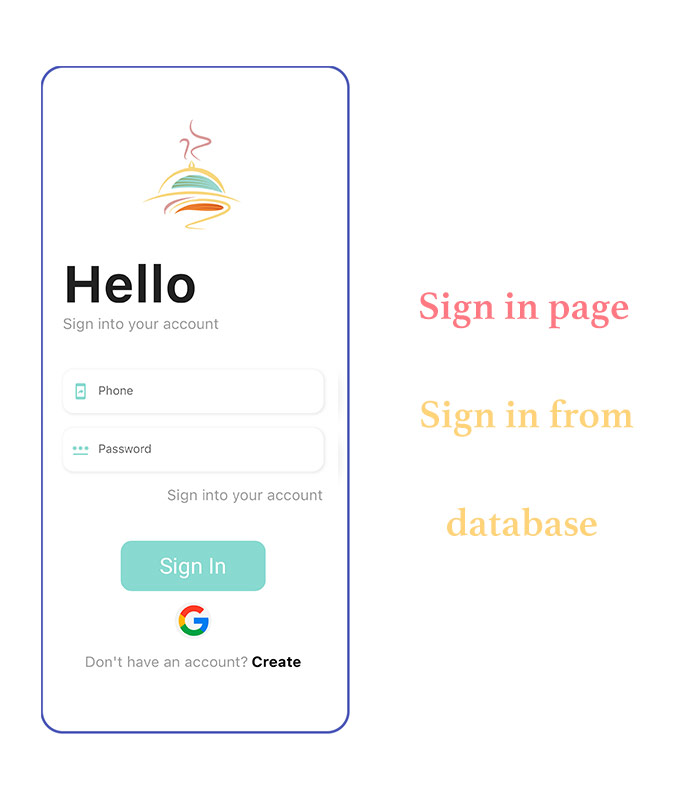
Sign in page
Sign in based on your phone number. The account information is matched on the backend using token and your credential.
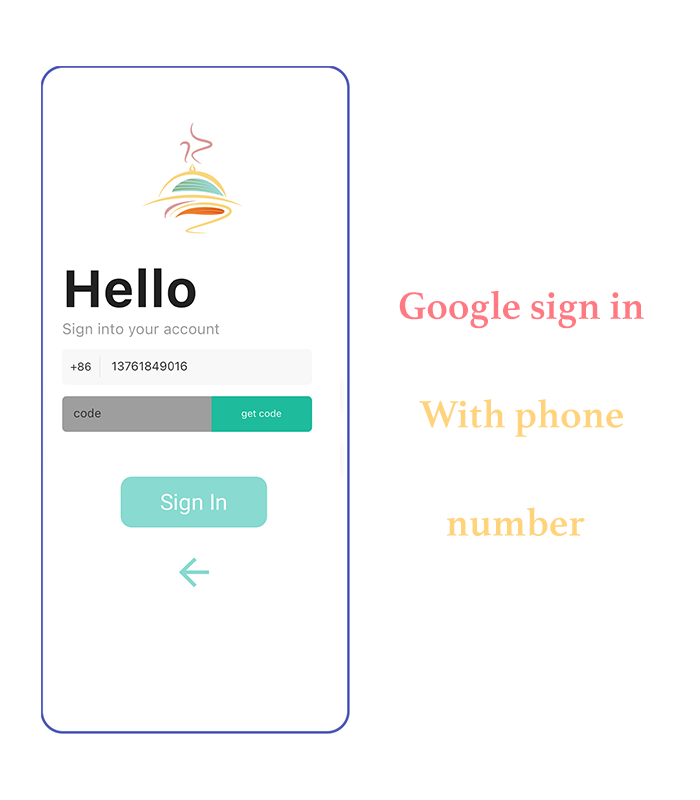
You may sign up using third party service like Twilio or Google provider. Either way, we send a verification code the user and then we login.
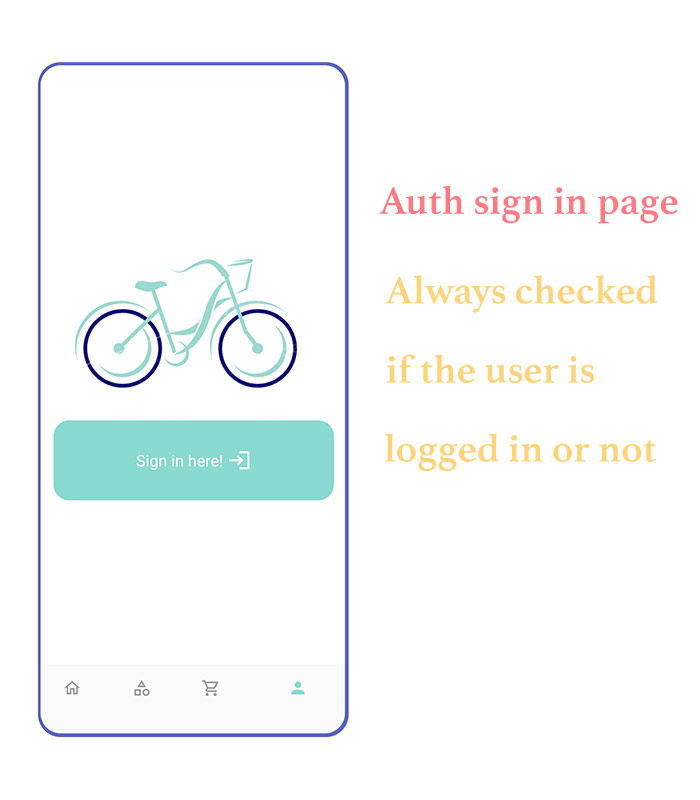
Auth page
If user makes unauthenticated request you, the app takes you to this page. Submitting order to the backend is always checked. Changing user credential is also checked using Authentication.
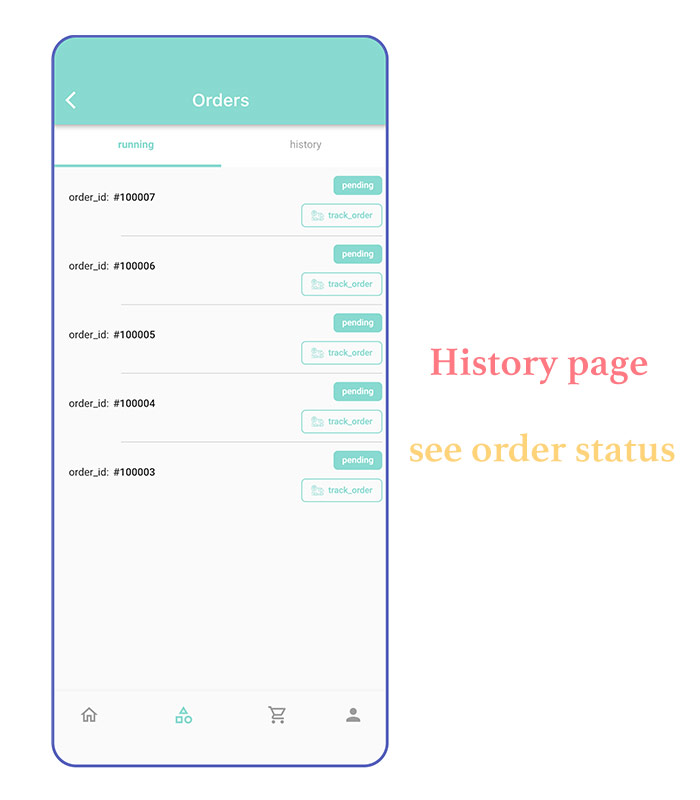
History page
You can see this information after you submit order to the backend. From here you will be able(still under development) to monitor your order tracking.
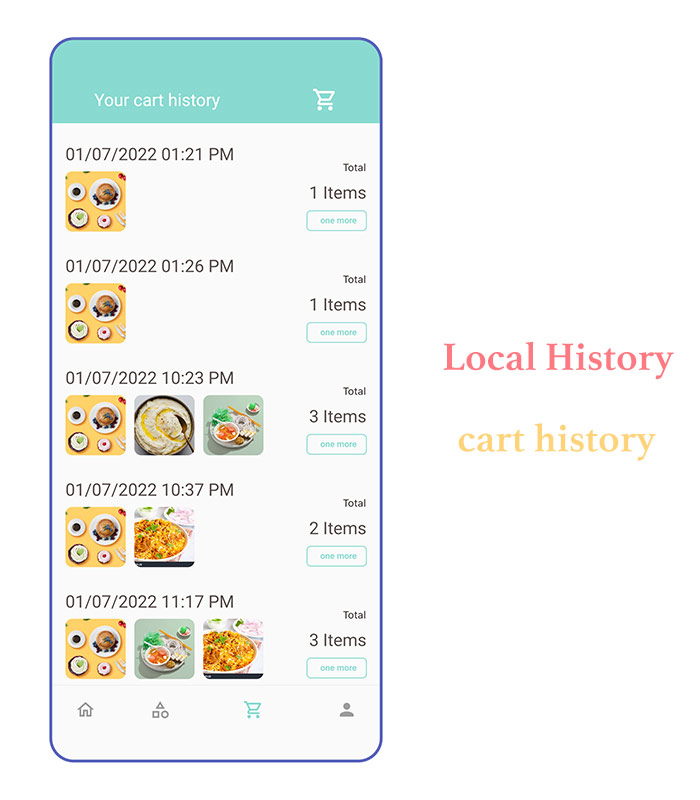
Local history page
Local history page. It saves in the device itself. You can reorder the item you ordered.
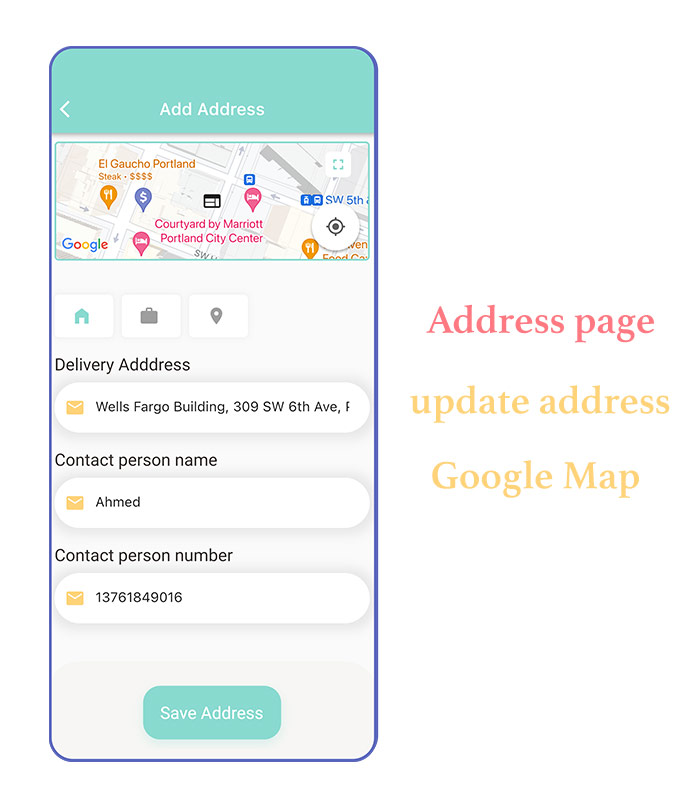
Update address
You can update your address here. During registration we don't need to put in the address. Address update during check out.
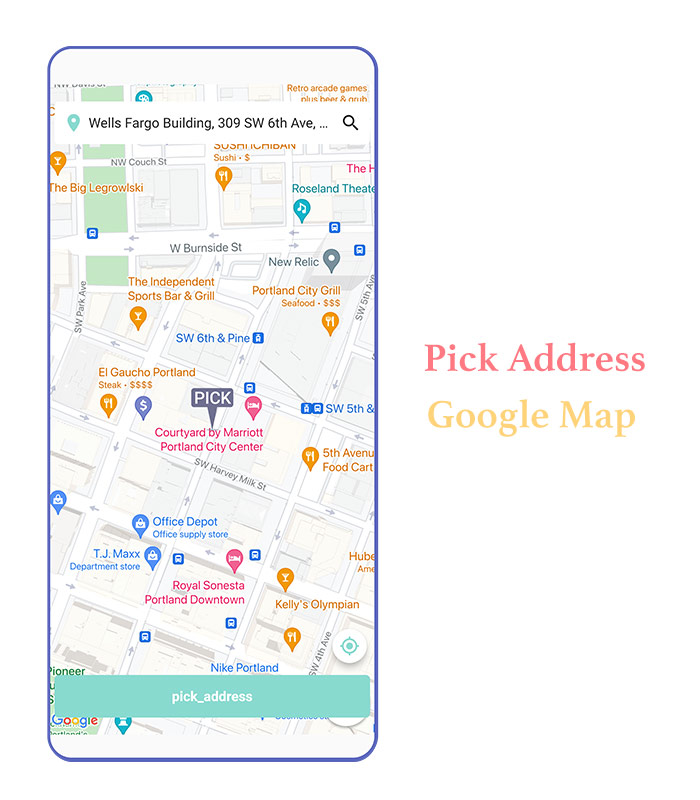
Pick address
User can pick your address here. This address is dynamic and based on Google map. Google map is a great tool for e-commerce site and delivery products or food.
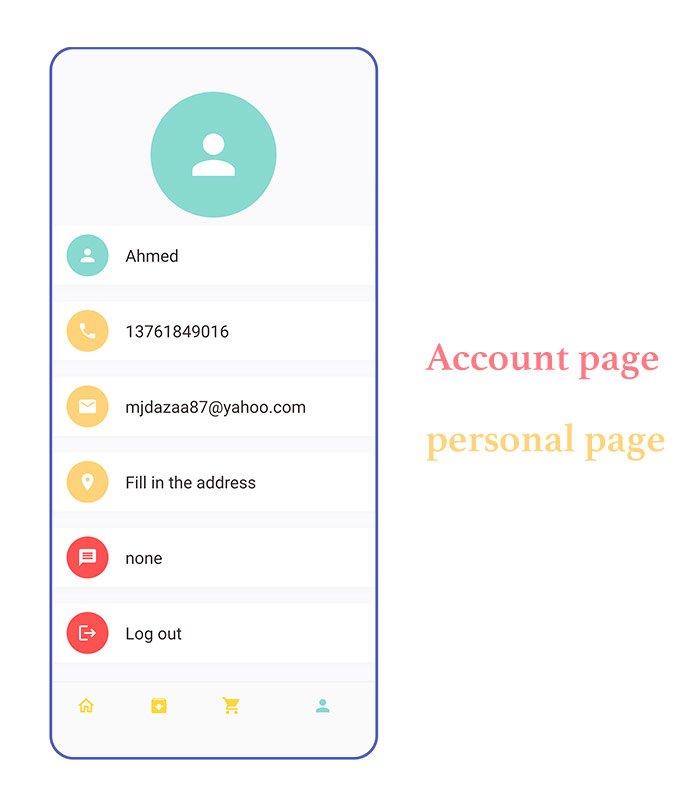
Account page
Your personal information is here. Here address could be updated.
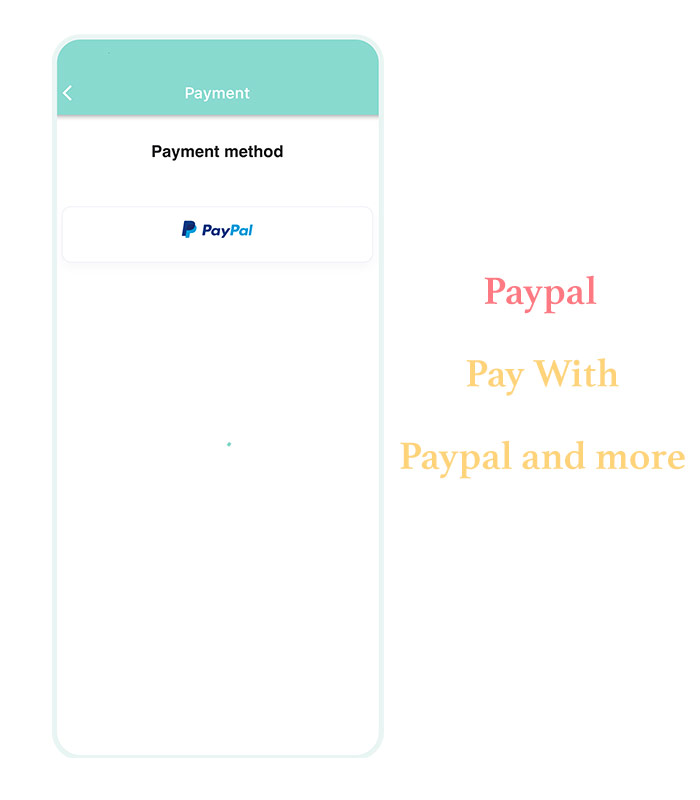
Payment method
We are going to use paypal as a payment method. Soon we will add stripe and other major payment methods.
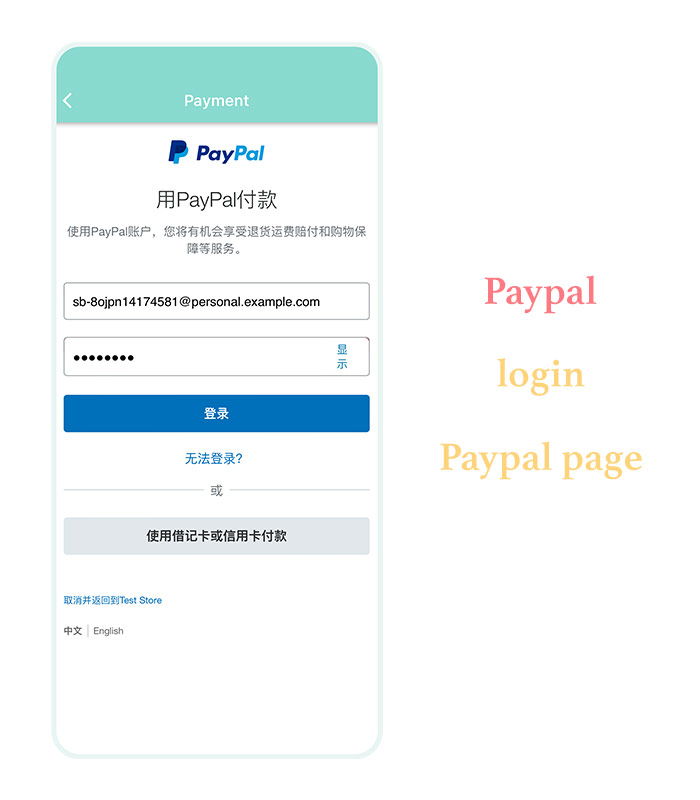
Paypal login page
Paypal login page. Here we have used paypal web view sdk for loading paypal pages and gateway
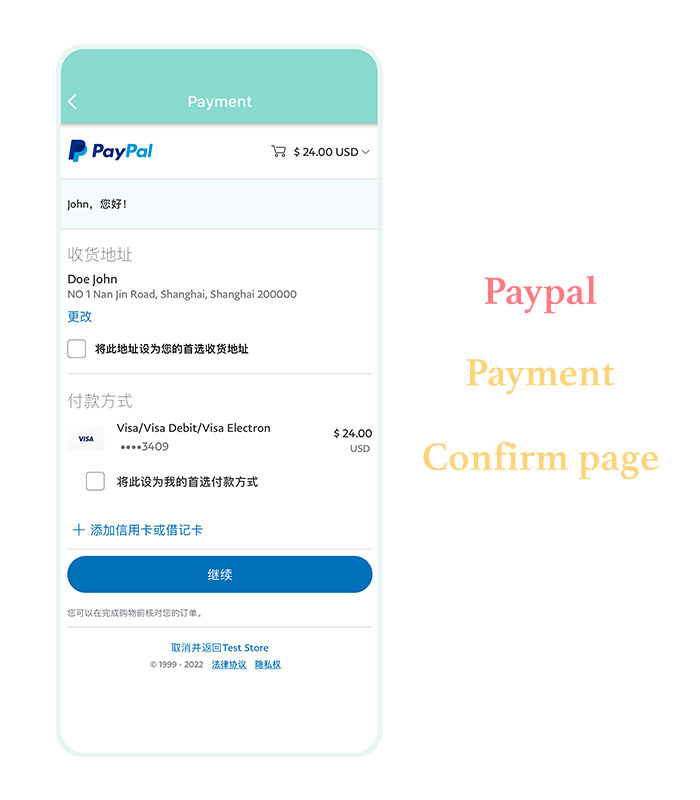
Paypal payment confirm page
Paypal payment confirm page. Here now we are in sandbox mode. Sandbox mode is used for testing.
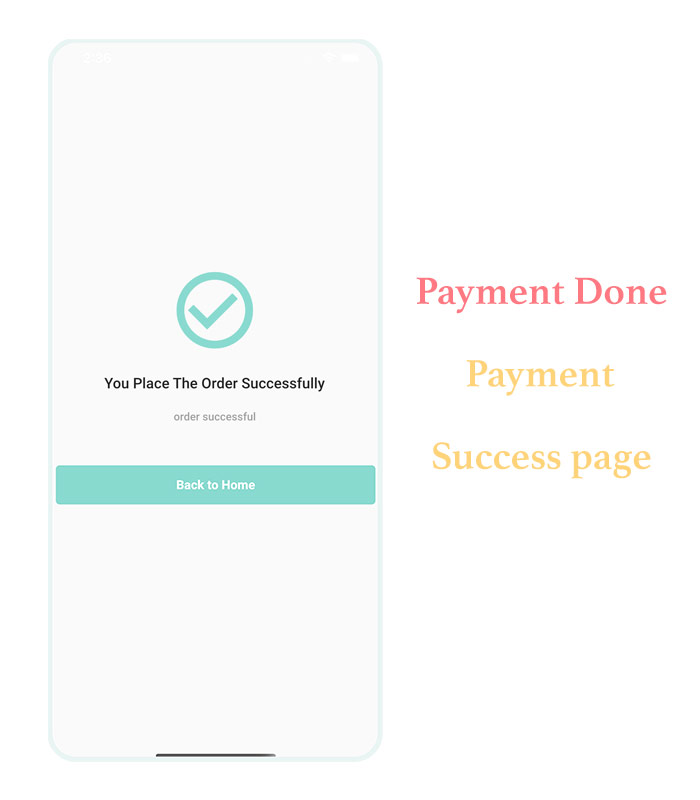
Payment success page
After payment has been successful, we redirect to payment successful page. It comes from paypal sdk.
Change log
45. 2025-05-31 Added comment and rating for each product
44. 2025-05-01 Upgraded to Flutter 3.29.0
43. 2025-02-16 Upgraded to Flutter 3.27.0 version
42. 2024-11-12 Upgraded to flutter 3.24.4 version
41. 2024-06-05 added wishlist(add and remove)
40. 2024-06-03 added list of notification screen and detail routing and other ui changes
39. 2024-06-03 added list of notification screen and current location on home page
38. 2024-1-24 added new feature as extras at the bottom
37. 2024-01-20 updated to the lastest version
36. 2023-12-02 update the end user app to the latest version and fix webview issue
35. 2023-08-22 update delivery boy app with latest flutter 3.10.0
34. 2023-06-30 update on cancel order
33. 2023-06-09 firebase OTP (phone number login)
32. 2023-05-26 stripe payment included
31. 2023-05-24 upgraded backend statistics about products and order and users
30. 2023-05-17 upgraded better notification with delivery boy app
29. 2023-05-17 update delivery boy app to flutter 3.11.0 sdk version
28. 2023-03-18 cash on delivery payment udpated
27. 2023-03-17 update keyboard hiding issues on the screen tap
26. 2023-02-27 upgrade to flutter 3.4 version
25. 2022-10-10 updated login and registration error message shown style
24. 2022-09-30 Phone number verification
23. 2022-08-11 Notification sound fix
22. 2022-08-01 Notification icon fix
21. 2022-07-20 Notification bug fix
20. 2022-07-10 Delivery boy notification
19. 2022-06-22 Business set up backend
18. 2022-06-19 Delivery boy app
17. 2022-06-18 From backend to Flutter app notification
16. 2022-06-18 Added backend receive notification
15. 2022-06-03 Added local notification
14. 2022-05-25 Basic firebase notification included
13. 2022-05-02 Added Search products
12. 2022-05-02 Added Updating profile(including profile photo and changing photo)
11. 2022-05-02 Added Google address bar
10. 2022-04-21 Bug fix for userModel
9. 2022-02-28 Paypal Payment Integration with flutter webview
8. 2022-02-10 Bug fix on more order page and update backend for order
7. 2022-02-08 Added new functions "more order" on history cart page
6. 2022-02-07 Bug fix on cart history page
5. 2022-02-03 Bug fix on the cart and adding quantity screen
4. 2022-01-30 Pick up locactoin from google map and save in the database
3. 2022-01-16 Bug fix on user profile
2. 2022-01-12 Solved address page crash error and show google map
1. 2022-01-10 first version(first part)
Installation
Flutter android studio windows installation
PHP =>7.3 or above
Laravel =>8.0
Admin panel windows installation
To install the admin panel in local host on windwos, follow the video below.
The above video shows how to download the admin panel for e-commerce app and install it in a local windows machine. The admin panel is based on Laravel framework. The admin panel requires prior installation knowledge of laravel framework on local machine.
But if you have never installed laravel framework, watch the video from the link below.
Admin panel mac installation
To install the admin panel in local host on mac, follow the video below.
The above video shows how to download the admin panel for e-commerce app and install it in a local mac machine. The admin panel is based on Laravel framework. The admin panel requires prior installation knowledge of laravel framework on local machine mac.
But if you have not installed Laravel Framework on mac watch video in the link below
Flutter sdk: ">=2.12.0 <3.0.0"
The backend is done with Laravel. Download the code from the patreon and install in your local or server. The mysql database is included there. After installing you will see the backend. Type in your domain with /admin. The defualt password is admin and password is admin too.
Make sure you give permission to /storage folder. In general it's 775. If it doesn't work then try 777.
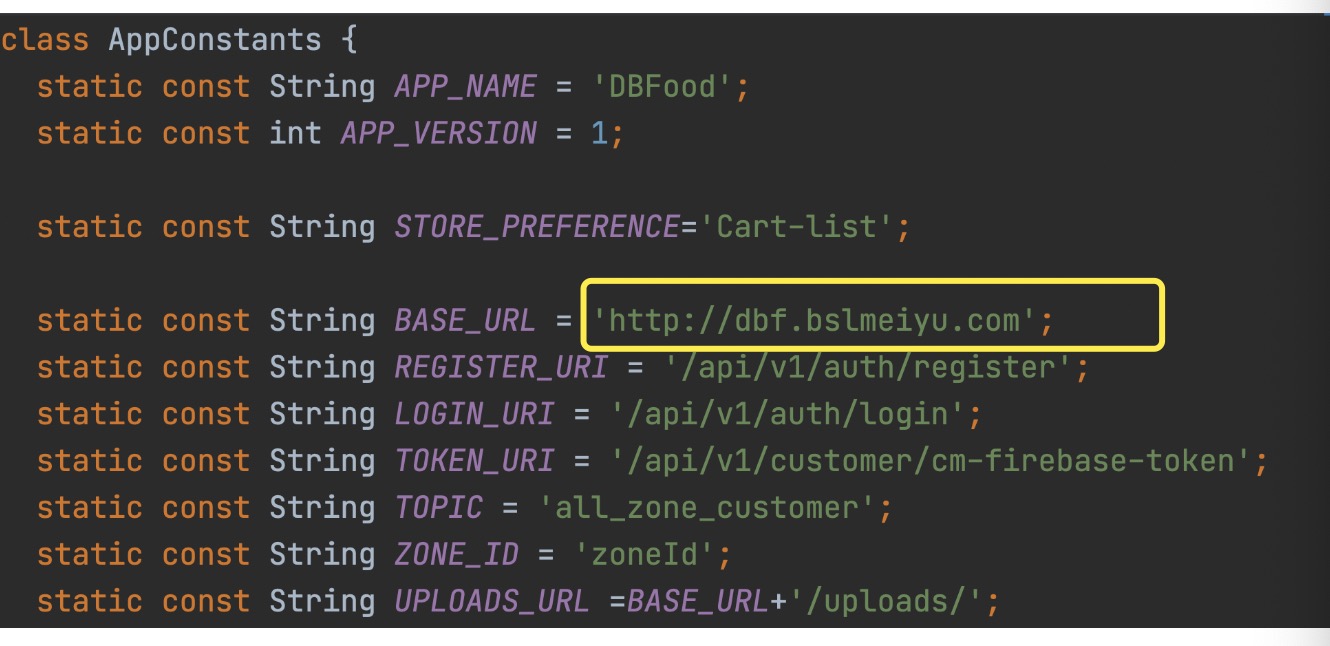
Change the base url in your flutter app. Use your own domain
Google Map Api Key
Make user that, you enable google map service from google. If you don't know how to do it, follow the tutorial here. After enabling you need to use your own api key in the app
When you set up Api key, you need to set up in two pairs
First pair
It's android users. If you use android then you need to set up google api key both for android and it's web version.
Second pair
It's for iOS users. If you use iOS then you need to set up google api key both for iOS and web version. But this web version api key should be the same as android web version.
So you need three google api key, one for ios, one for android and one for web api.
One of the errors you might get
API keys with referer restrictions cannot be used with this API.
This means you have set up wrong api key.
Error getting the google api
Watch the video to verify your local testing with google map
About the backend technology used in the app
If you are trying to upload images from the backend, you need to make changes in .env file.
In the .env file make a little change in the APP_URL.
APP_URL=http://127.0.0.1:8000/You see how we put the slash at the end.
Part 4 requires you to create a new table name zones for zone based services. Follow the video to create a table.
You also need to have model name Zone.php in the app/Models/ folder. And put the code in the file from the link below
Use PhpMyAdmin to make the database table zones
If you hosting it in shared host, after visiting in the brower, you might get like this
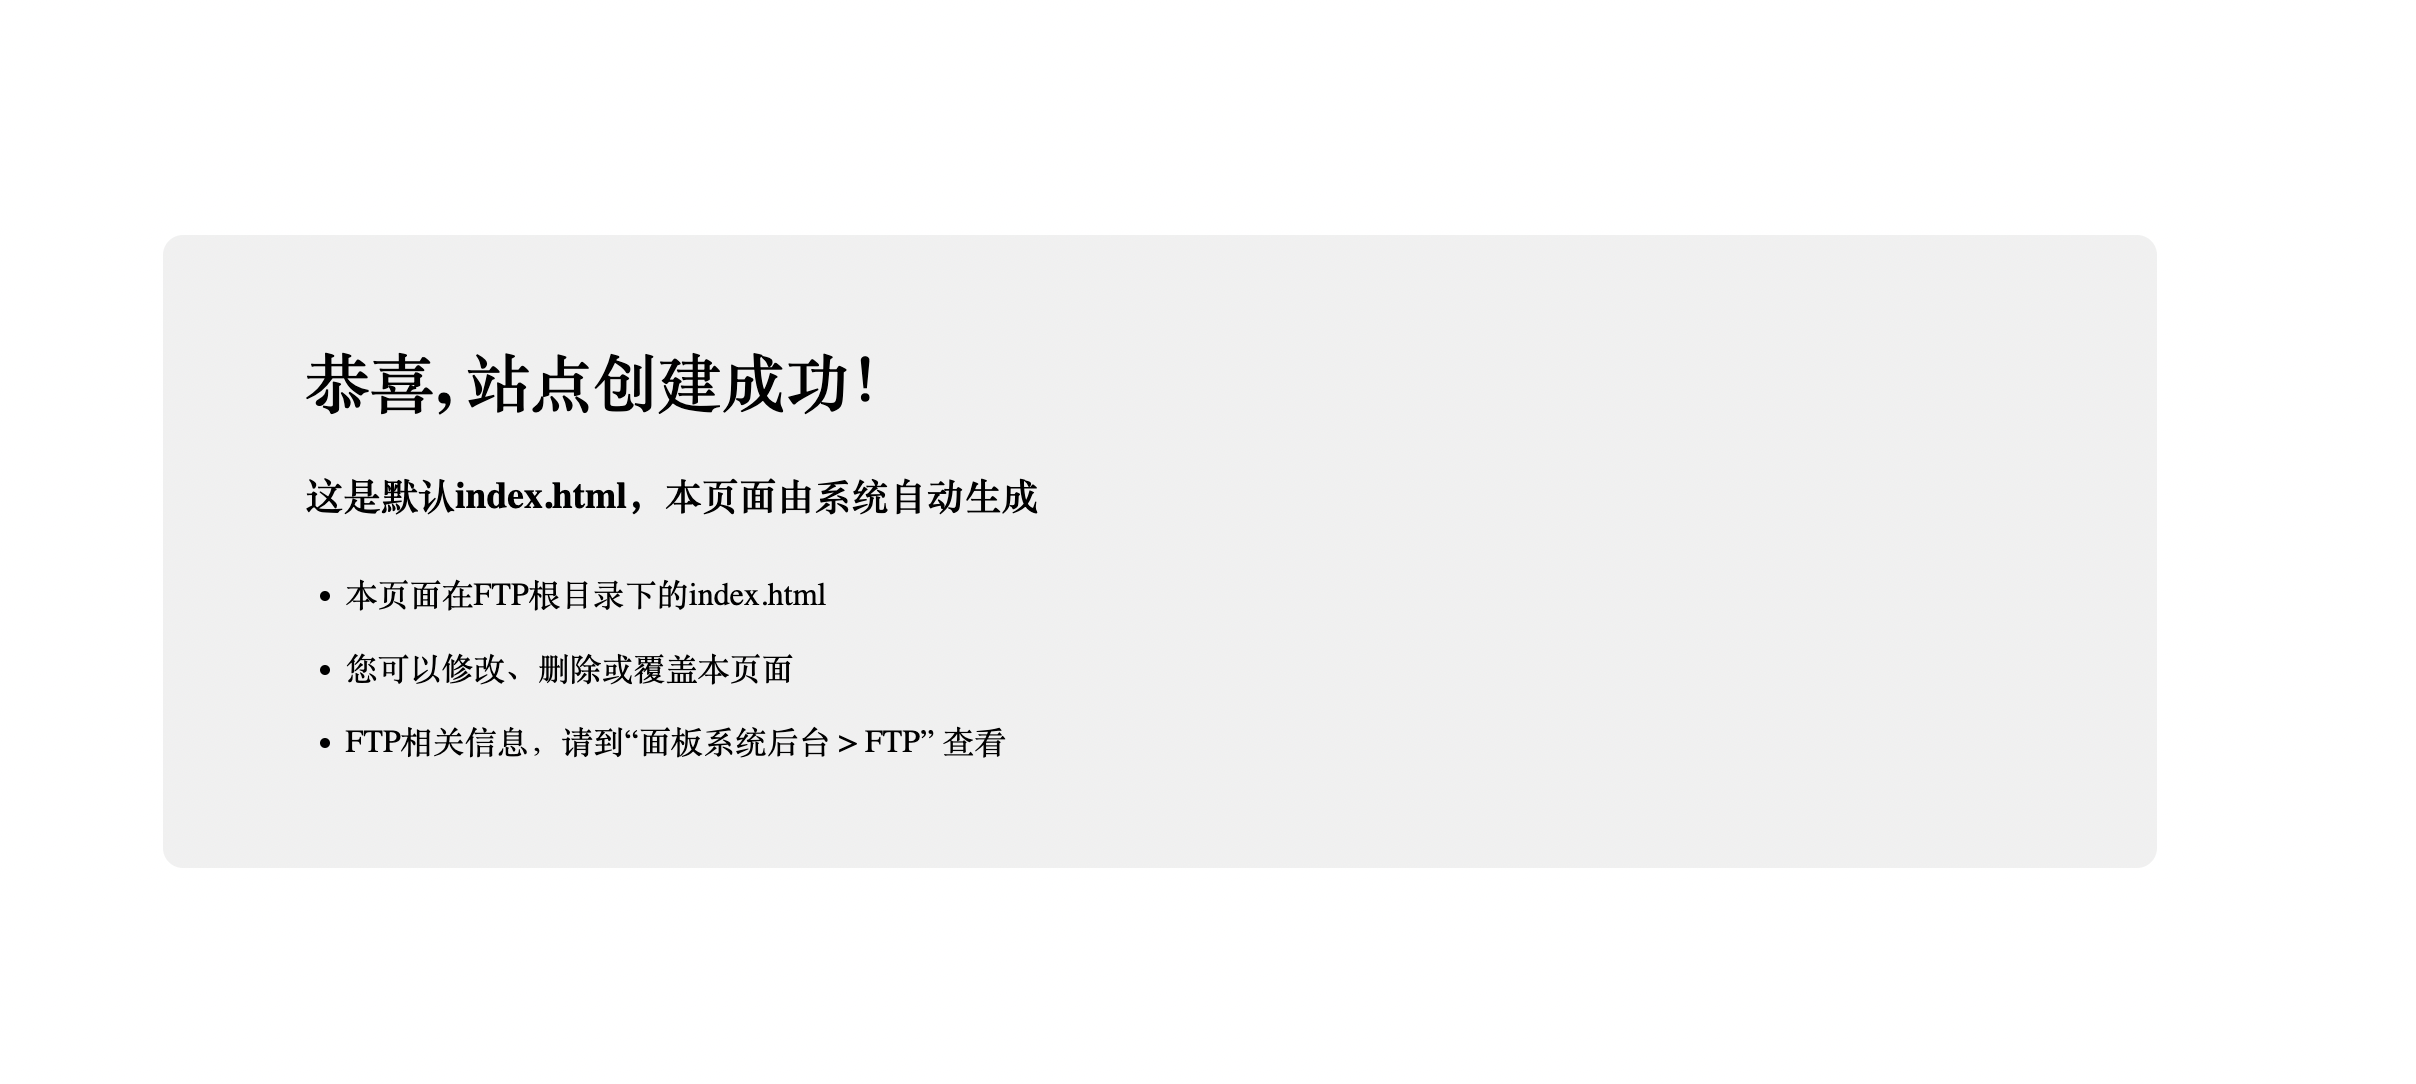
This means, your site in shared hosting setting problems and website is not able point to the public folder of Laravel.
To solve this create .htaccess file in the root folder of your project and put the code in .htaccess file
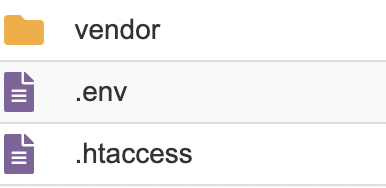
 RewriteEngine On
  RewriteRule ^(.*)$ public/$1 [L]
Learn more about it here htaccess file
If the above solution did not work, then tryin the .htaccess. file
    Options +FollowSymLinks
    RewriteEngine on
    RewriteCond %{REQUEST_URI} !^public
    RewriteRule ^(.*)$ public/$1 [L]
Our e-commerce or shopping app does payment. We implemented payment using paypal sdk using webview. Part of the code is given here in the link below
Payment requires special settings in the payment view page. We need to read this from the backend database.
Follow the link below and put the code according to the link
Otherwise you will get error

LogicException: Unable to read key from file file://C:\xampp\htdocs\shopping-app\storage\oauth-private.key in file C:\xampp\htdocs\shopping-app\vendor\league\oauth2-server\src\CryptKey.php
To solve it you need to run the below command
php artisan passport:install7. You may have error in the payment section when you access user information in the backend code. The error could be like below
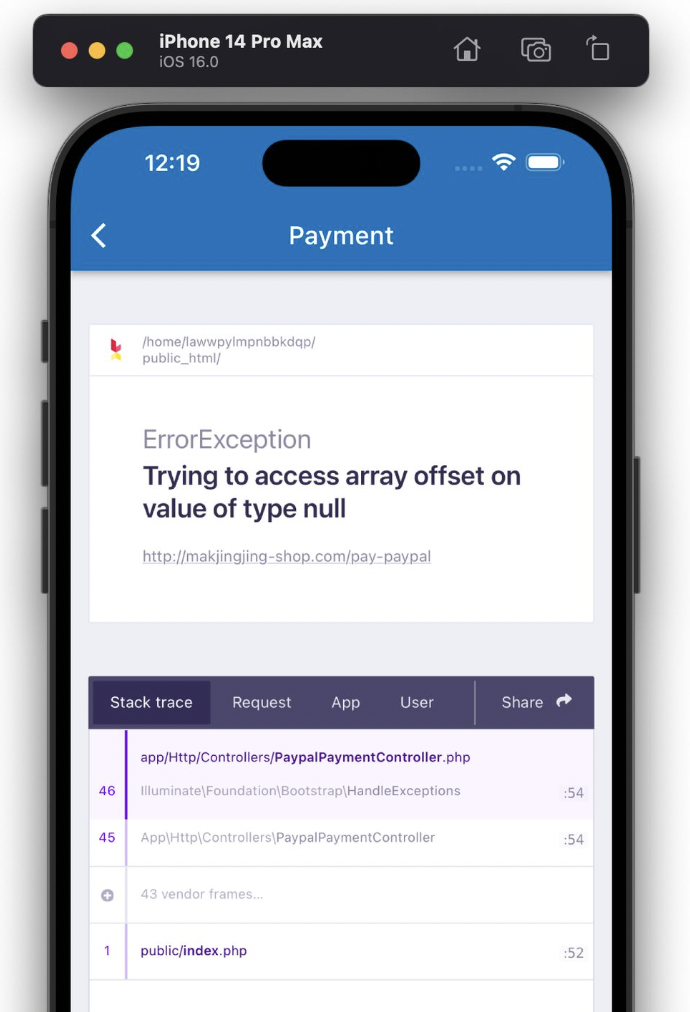
To solve this make some changes in the PayPalPaymentController.php file
   $number = sprintf("%0.2f", $order['order_amount']);

        $item->setName(session('f_name'))
            ->setCurrency(Helpers::currency_code())
            ->setQuantity(1)
            ->setPrice($number);
We have inserted session('f_name') inside setName().
8. Laravel Toastr package issues
Laravel toastr package may cause issues, it mostly does due to path is incorrect. Check out the video below to solve this issue
Flutter Frontend Issues
For the app in the part 3, you might have trouble resigtering new users. You might get forbidden error. That happens because change login method. So you need to make a change in your app. You may continue to finish part 3 or you can fix this first and then continue. If you decide to fix this issue first then watch the video in the link
This app downloads data from the internet. Your android emulator might have insecure settings. it happens due to http rather than https. Try the solutions in the link below
Connection closed while receiving data
If you have more errors go to the link below
If you get the above error try to add this in your ApiClient.dart
"HttpHeaders.contentTypeHeader": "application/json"
Then your _mainHeaders variable would look like below
_mainHeaders={
      'Content-type':'application/json; charset=UTF-8',
      'Authorization': 'Bearer $token',
      "HttpHeaders.contentTypeHeader": "application/json"
    };
The above error should be caused by image loading. And If the above solution did not work for you then you can try below solution. Use cache for network image
https://learnflutter.co/flutter-order-model-for-payment/
Copy all the code from the link above and put in the models folder as order_model.dart
https://learnflutter.co/flutter-place-order-model-for-e-commerce-app/
Copy all the code from the above link and put in the models folder name place_order_model.dart
With this we incapsulate all the information about the order.
We missed a line in google map.
Address does not show up even after filling in the address in account_page.dart

in account_page.dart inside build method add the line
Get.find().getAddressList() Flutter Travel App
Flutter 3.0 Master Class
2025-06-03 02:49:29
ko có source full à
2025-06-03 02:49:29
ko có source full à
2025-06-03 02:49:28
ko có source full à
2025-06-03 02:49:25
ko có source full à
2025-04-25 11:46:06
Great In-depth written blog! A complete guide on the food delivery app development process is included, but if you want to develop an app like Zomato. Visit here - https://bit.ly/42QpypQ
2025-04-25 11:46:03
Great In-depth written blog! A complete guide on the food delivery app development process is included, but if you want to develop an app like Zomato. Visit here - https://bit.ly/42QpypQ
2025-01-01 02:22:55
e
2024-01-10 04:36:09
Thanks for liking
2024-01-09 17:18:50
sir your content was so amazing
 Starter file
 Get the apk