Let's understand riverpod code generation file step by step from generated hash code, Provider type, Provider internal method, Provider class constructor to typedef of our state class.
For the sake of understanding I will be using a lot of photos. Let's see the below image
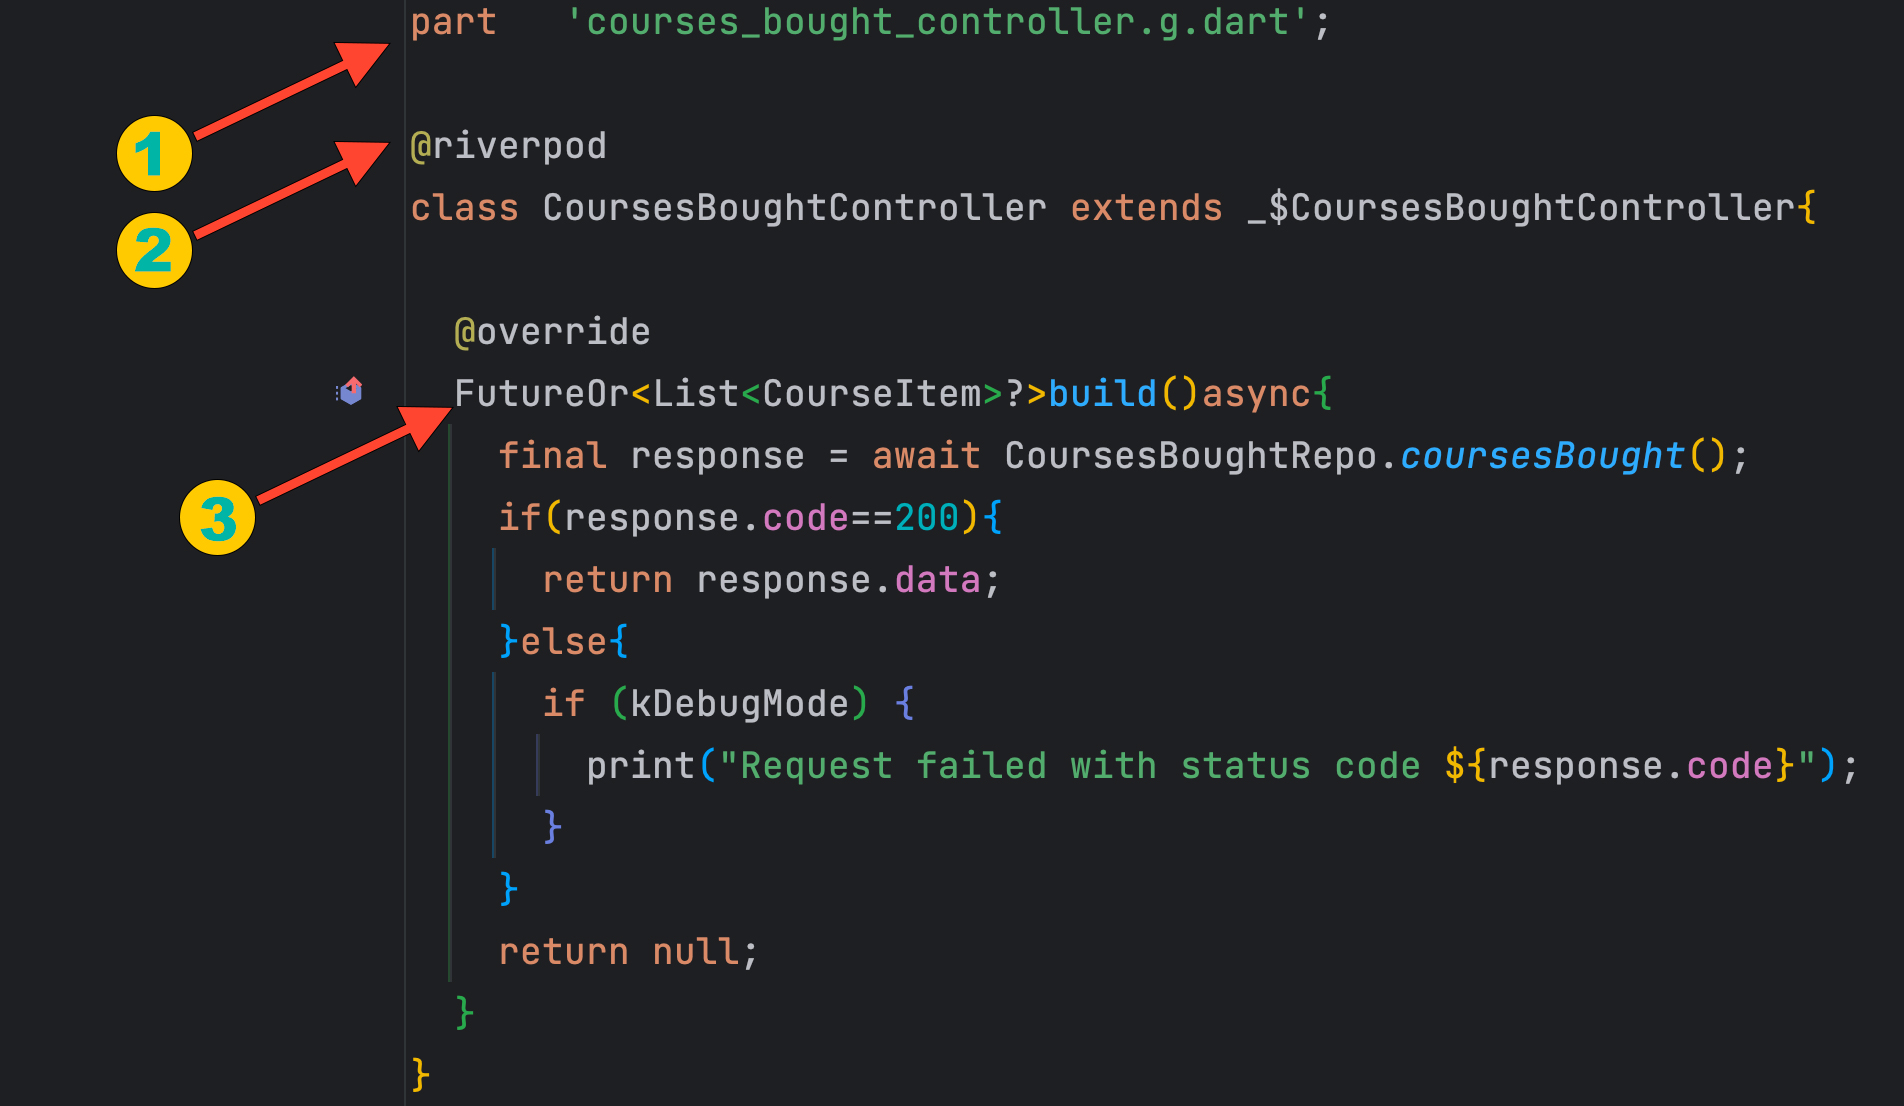
File path
The above image tells us a tons of information. The very first point tells where the generated code file would be located. This path must contain the same name as your Provider class file name with suffix g.dart. Any mistakes in the naming would not generate our file, therefore precaucious is very important.
Riverpod annotation
Then we see @riverpod annotation in second point, this simply tells the compiler that we will generate our Provider using code generation plugin.
flutter pub add -d riverpod_generator
So make sure you have the plugin installed, if not use the below command. After that you need to double check whether package path is imported or not. If not imported automitically use the below path.
import 'package:riverpod_annotation/riverpod_annotation.dart';
Continue from there, we just created a class CoursesBoughtController, and this class would be managed by our Provider class.
Return type build() method
First we will start with creating our Provider class. We will create a class that gets data from the external world. This provider class could be done along with family modifier, but we will not use family modifier in this example.
We will have our own repo that would request data from the server and then our provider will return build() method with a type which is mentioned in point three. The returning data type would be a List of custom objects for build() method. build() method's return type defines whether we are doing to have AsyncNotifier or Notifier.
Since we are going to have a network call, which involves await/async, we must therefore return a AsyncNotifierProvider.
Now this AsyncNotifier or AsyncNotifierProvider might not make sense a lot early in this tutorial. You may follow the below tutorial to make sense of it.
Since we have a basic understanding of AsyncNotifier or AsyncNotifierProvider type, we are going to use Future to wrap our List which contains custom objects.
Now instead of Future we may also use FutureOr to wrap our List so that we have a better usage of the data returned from the API call.
Now the above picutre gives you better idea what I was discussing until now. Right after build() we also see async keyword since we are awaiting on our repo call.
Next we will see what our class extends. The class we created name CoursesBoughtController which extends _$CoursesBoughtController.
The above extended class _$CoursesBoughtController is typedef. Typedef is just simply an easy renaming of a long or complex variable. If you place a class that is being extened, you will see an error, but you need to ignore that at moment. This error would be gone once you run the build command.
Now we need build_runner plugin to be installed. Make sure you have installed it by running the below one
flutter pub add -d build_runner
After that if you write your build() method's body correctly we are ready to generate code for our Provider class. To generate code run the below build command.
flutter pub run build_runner watch --delete-conflicting-outputs
If everything went successfully, we will see a new file name course_bought_controller.g.dart has been generated in the current folder.