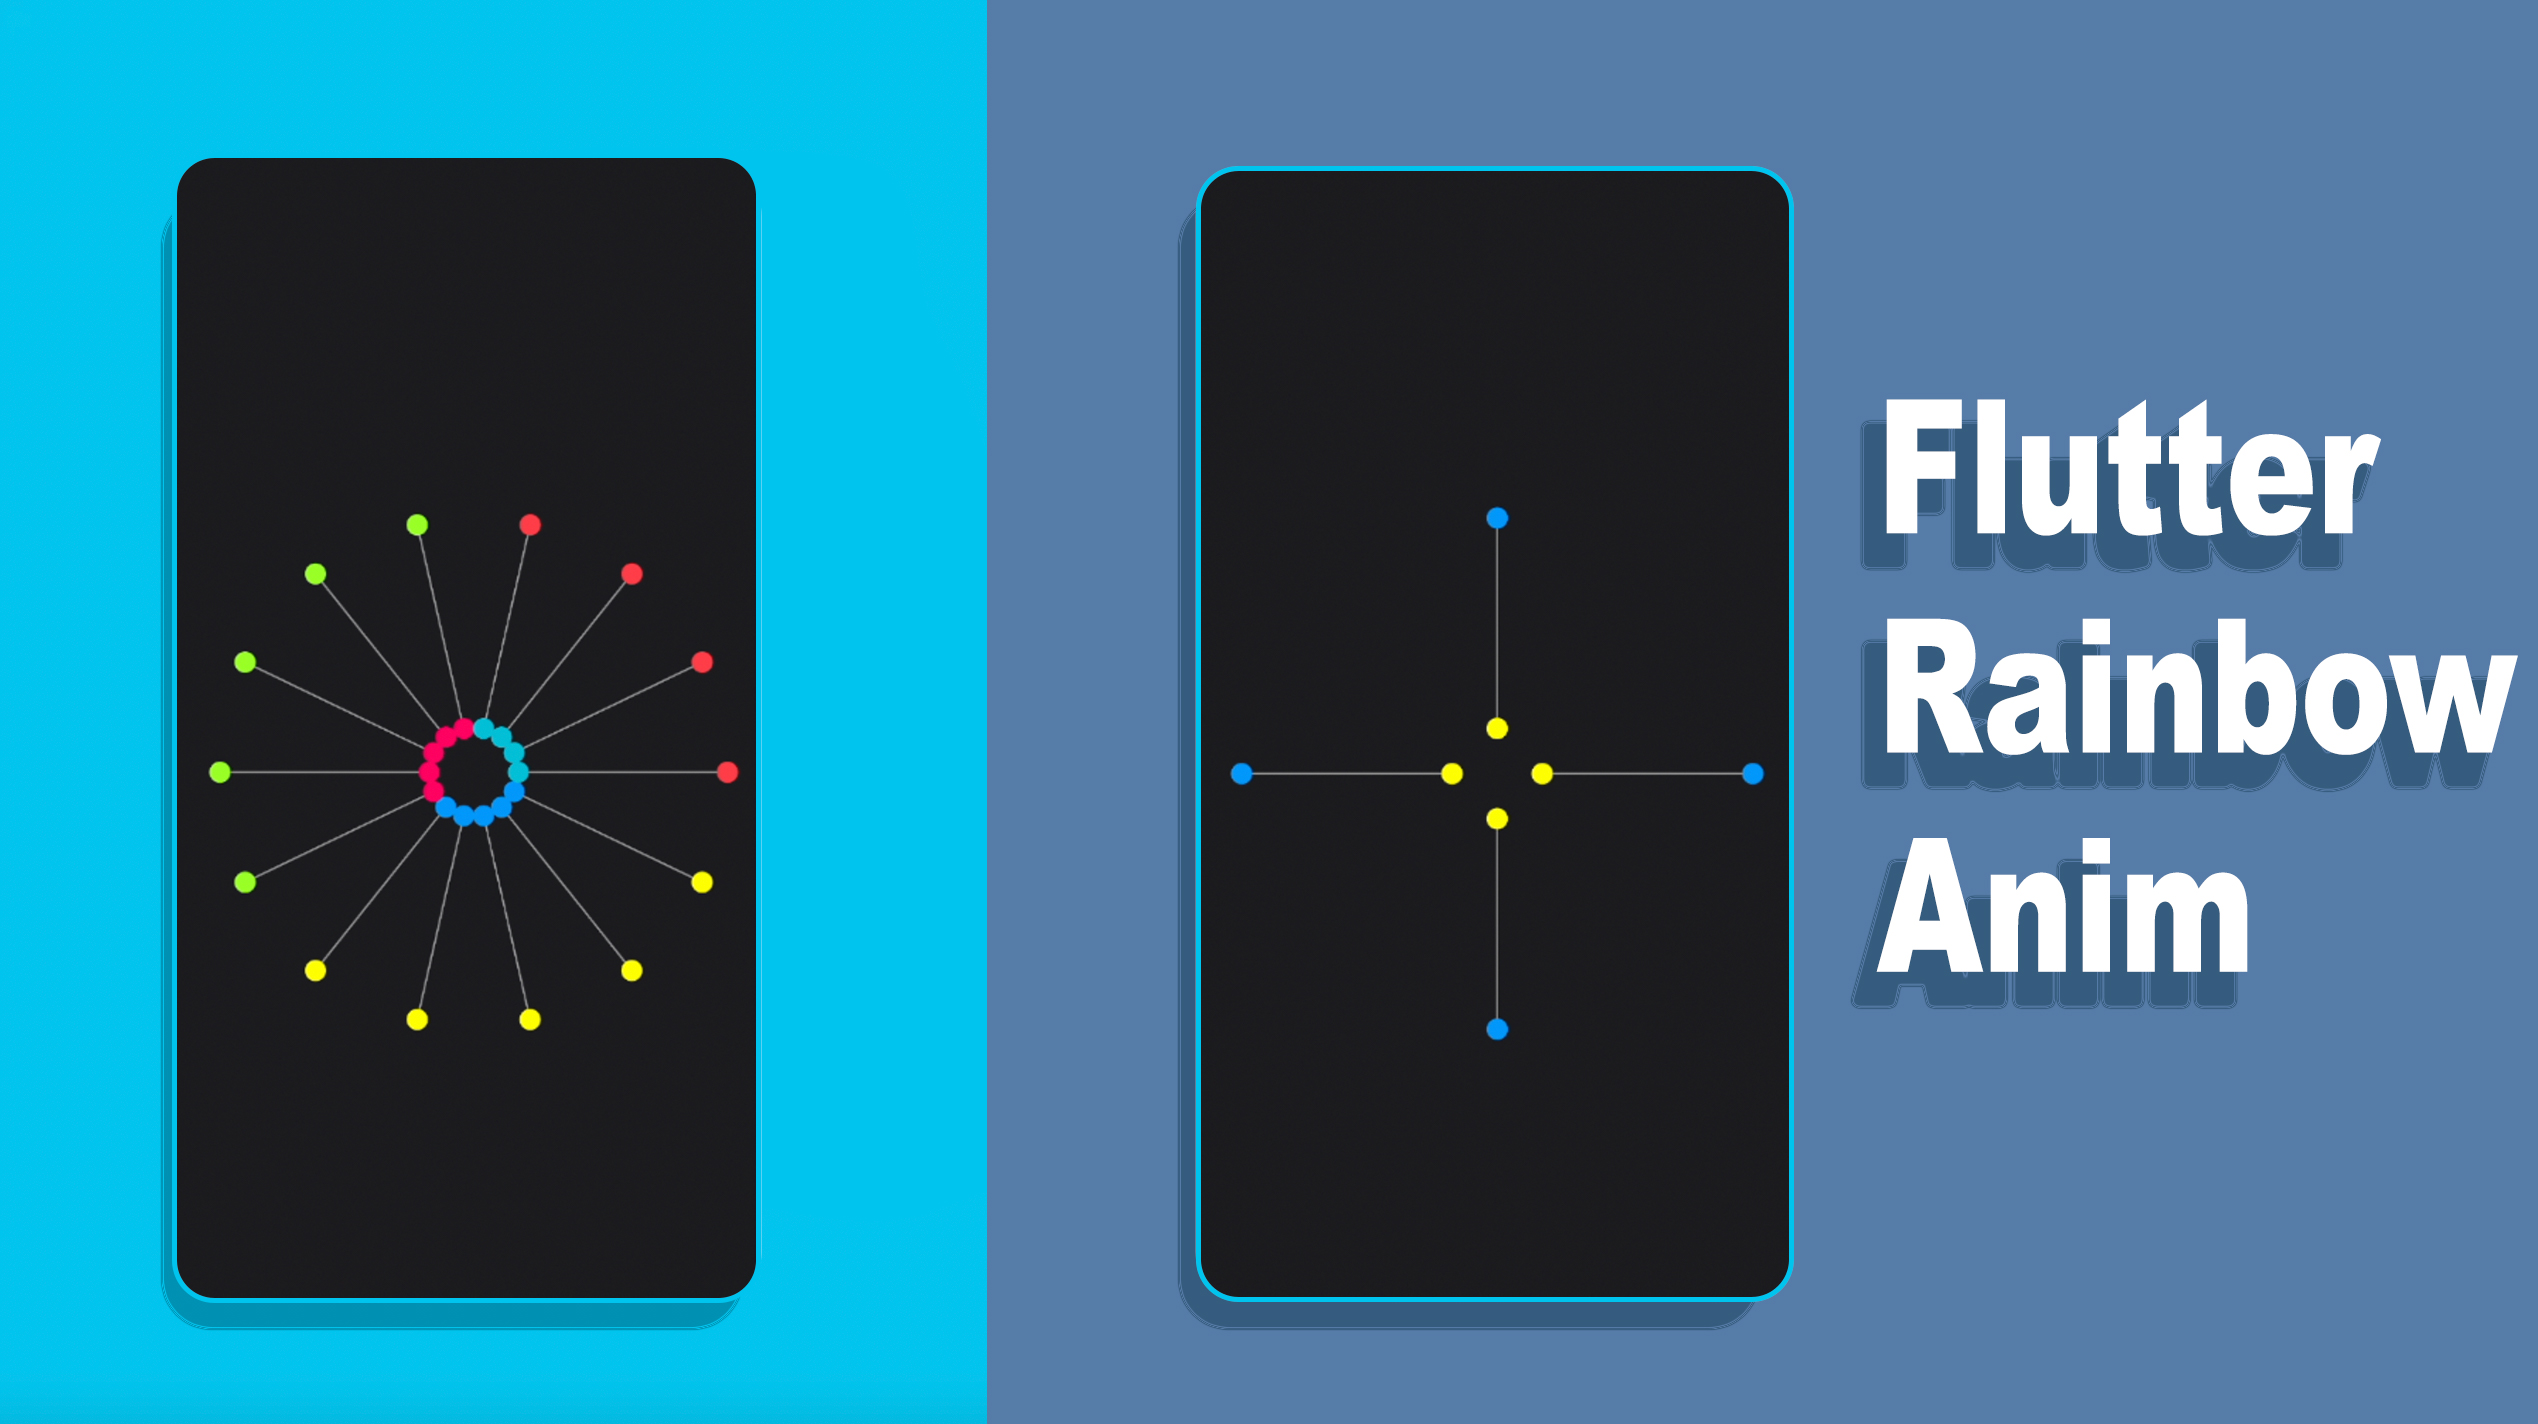
Here we will see another Flutter cool animation with showcase of Rainbow stick animation. We will cover the basic maths like rotation and translation matrix and angles in radians. This would be based on cirlces, meaning that, we will have lot of small cricles.
This is a tutorial step by step explaining all the technology and api needed a for a cool animation in Flutter.
Since we are doing animation, we must use a StatefulWidget class. We don't need GetX, BLoC or Riverpod since we are using StatefulWidget class. We will maintain our own state using SingleTickerProviderStateMixin
SingleTickerProviderStateMixin maintains our animation state. Then we would be able to access AnimationController class.
I would say without AnimationController class, you won't be able to do animations.
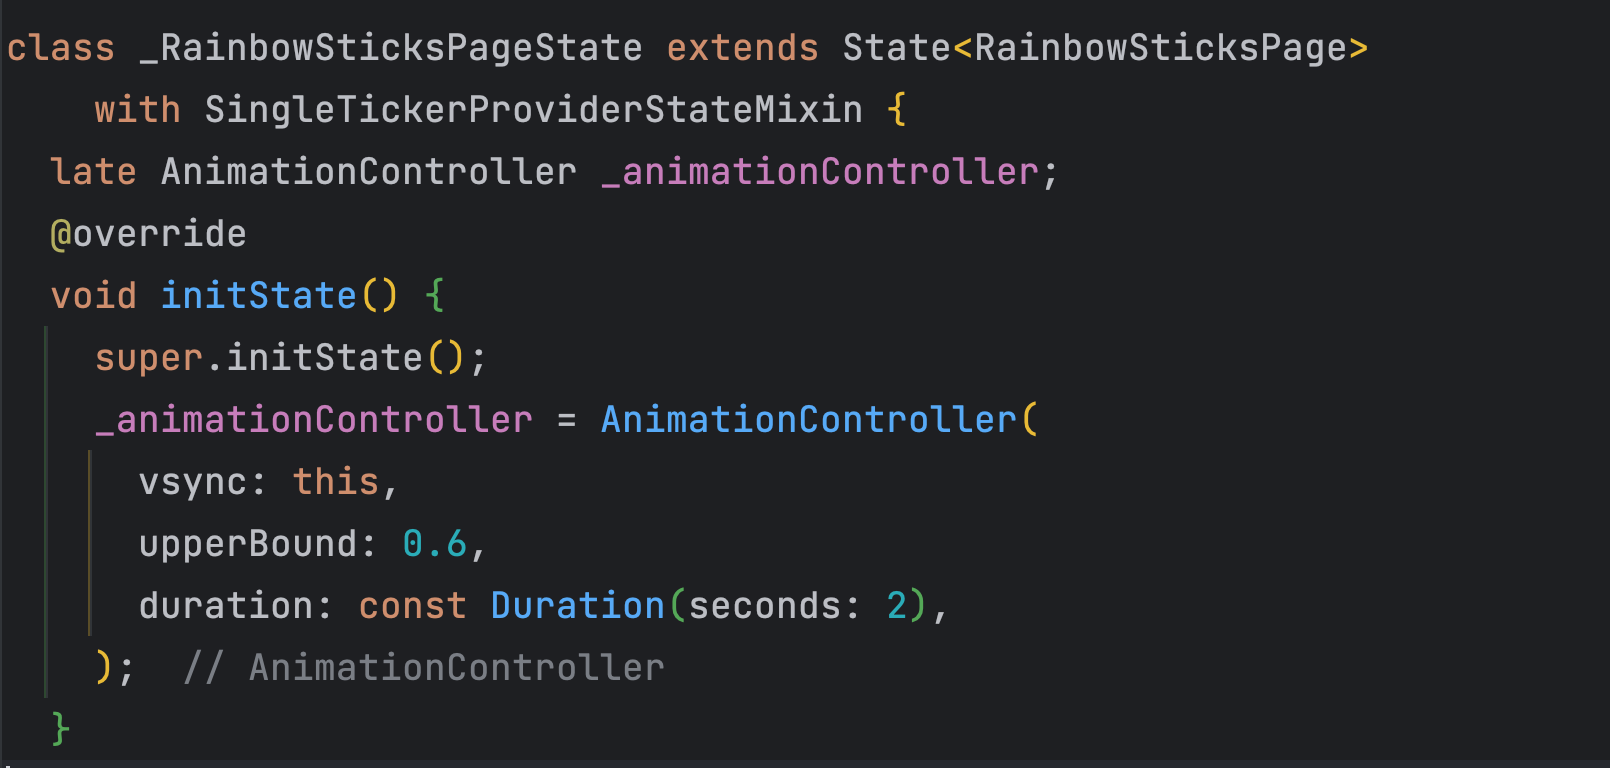
Here you see we are using SingleTickerProviderStateMixin and AnimationController class. At the same time we have initState() method to initialize the animation state. SingleTickerProviderStateMixin and vsync work hand in hand to provide smooth animation. You may think of SingleTickerProviderStateMixin and vsync work together to maintain the refresh rate of the device screen.
Then we have this upperBound that controls how much animation we should have. This upperBound binds with the end value of Interval(). upperBound and the end value of Interval() have to be same for a smooth animation. If you put upperBound value less than Interval() end value, you might see half of the animation.
The default value of upperBound is 1.0, in this case, the animation will run completely but faster within a given time.
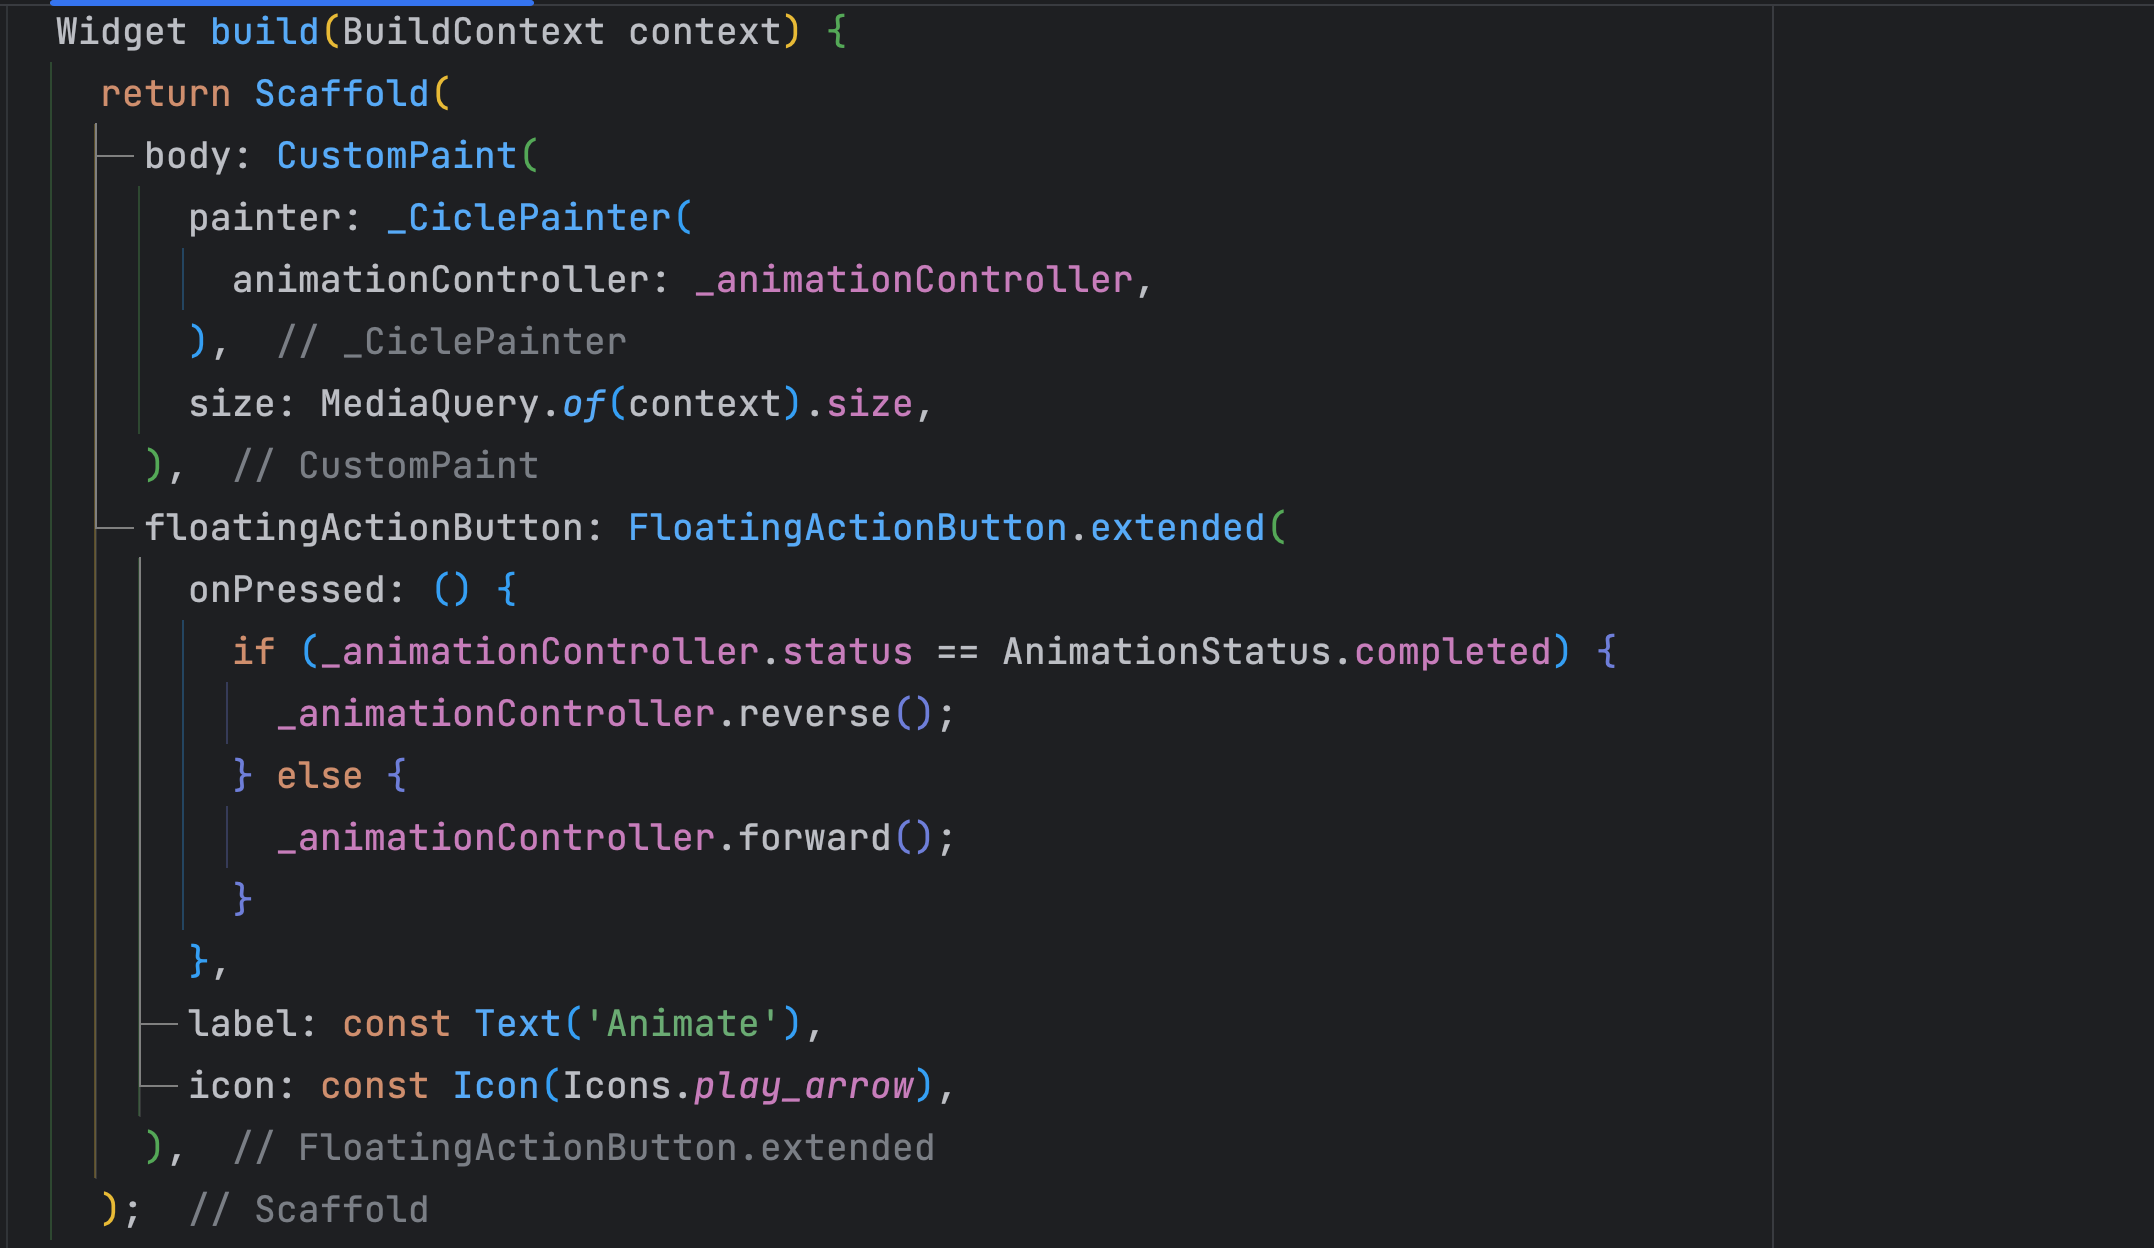
Here inside the onPressed callback we trigger the animation lifecycle. Clearly you can see reverse() and forward() functions on the AnimationController object _animationController.
At the top we see that we have CustomPaint() class which requires a painter callabck object. We have it as _CirclePainter() class.
Within the _CirclePainter() we pass an AnimationController object so that we can choose a kind of animation we want. There are many different types of animation like CurvedAnimation, ColorTween, SizeTween and RectSize.
Here we are going to use CurvedAnimation(), since we want animation effect and value change over time rather than static.
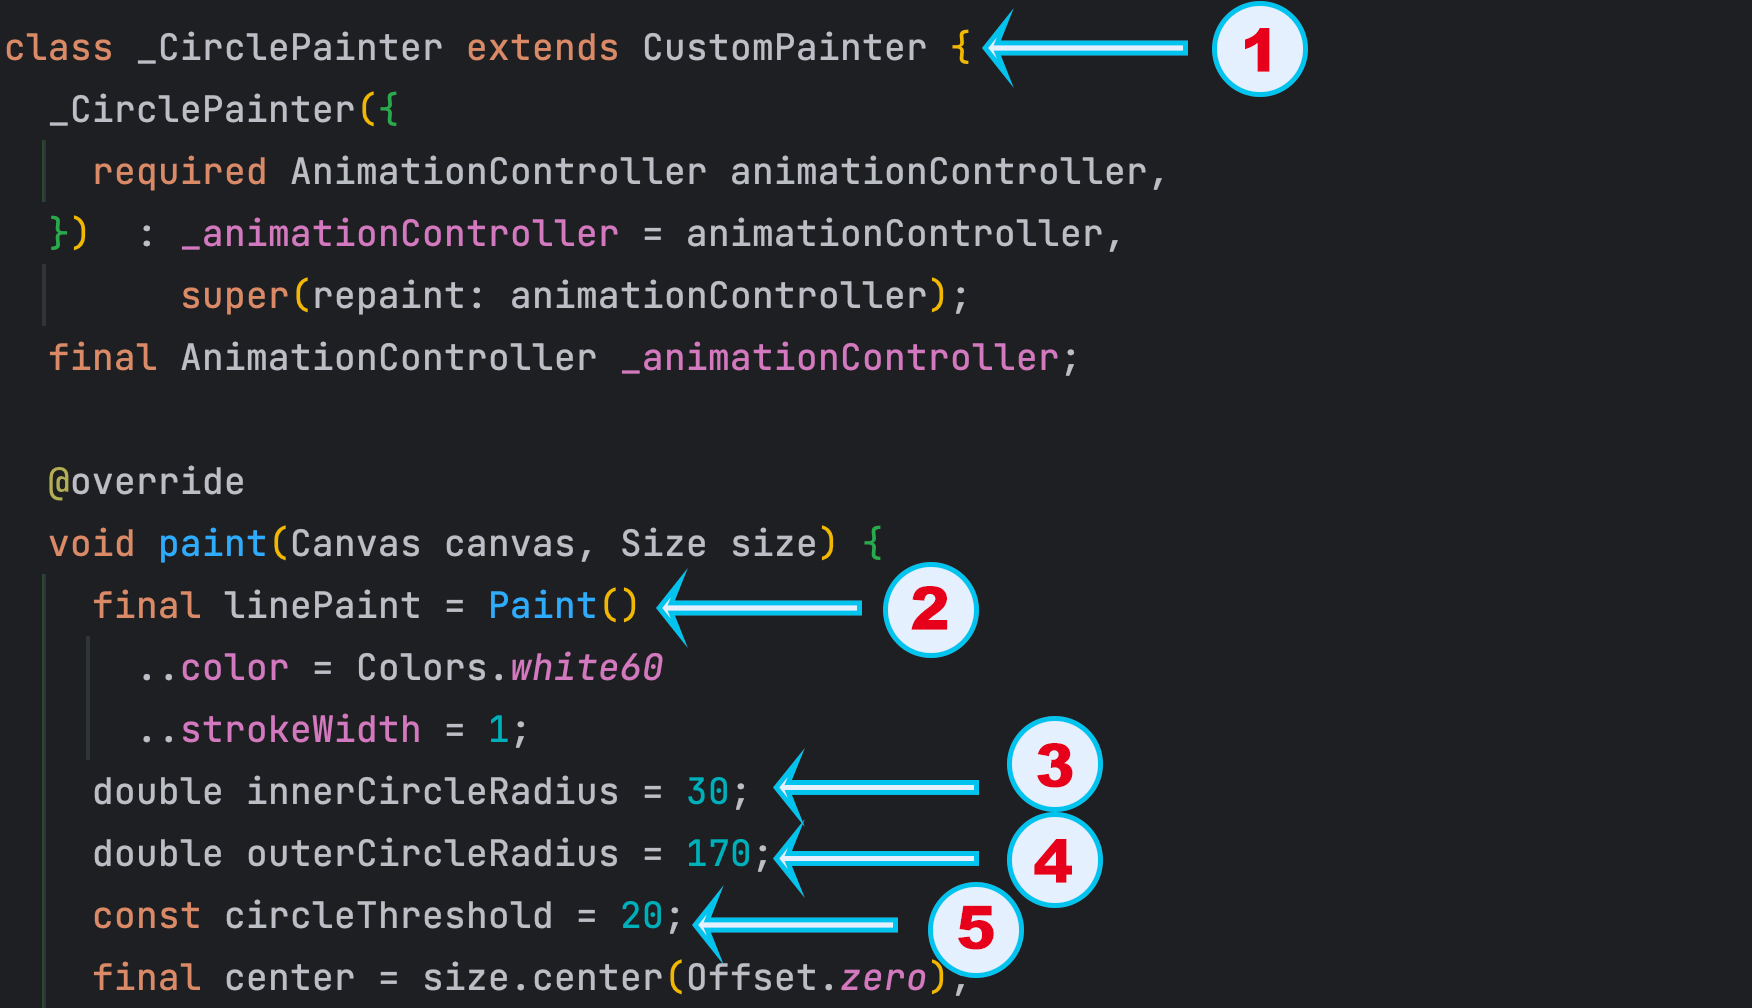
At the top you see we have extended CustomPainter() which actually does the painting on point 1. This class provides the resources for drawing on the screen and update the screen.
Then we see Paint() which is available because of CustomPainter() class on point 2. The Paint() class contains different properties which of them are Colors and Strokes.
At the same time we have access to Canvas object which keeps the drawing or painting record. Definitley we will have access to below methods.
You should know that all the default mathematical operations are done by Canvas object.
After that on point 3, 4 we see the circle radius. These are two invisible circle radius where we will put small circles with different colors. See the picture below for better understanding
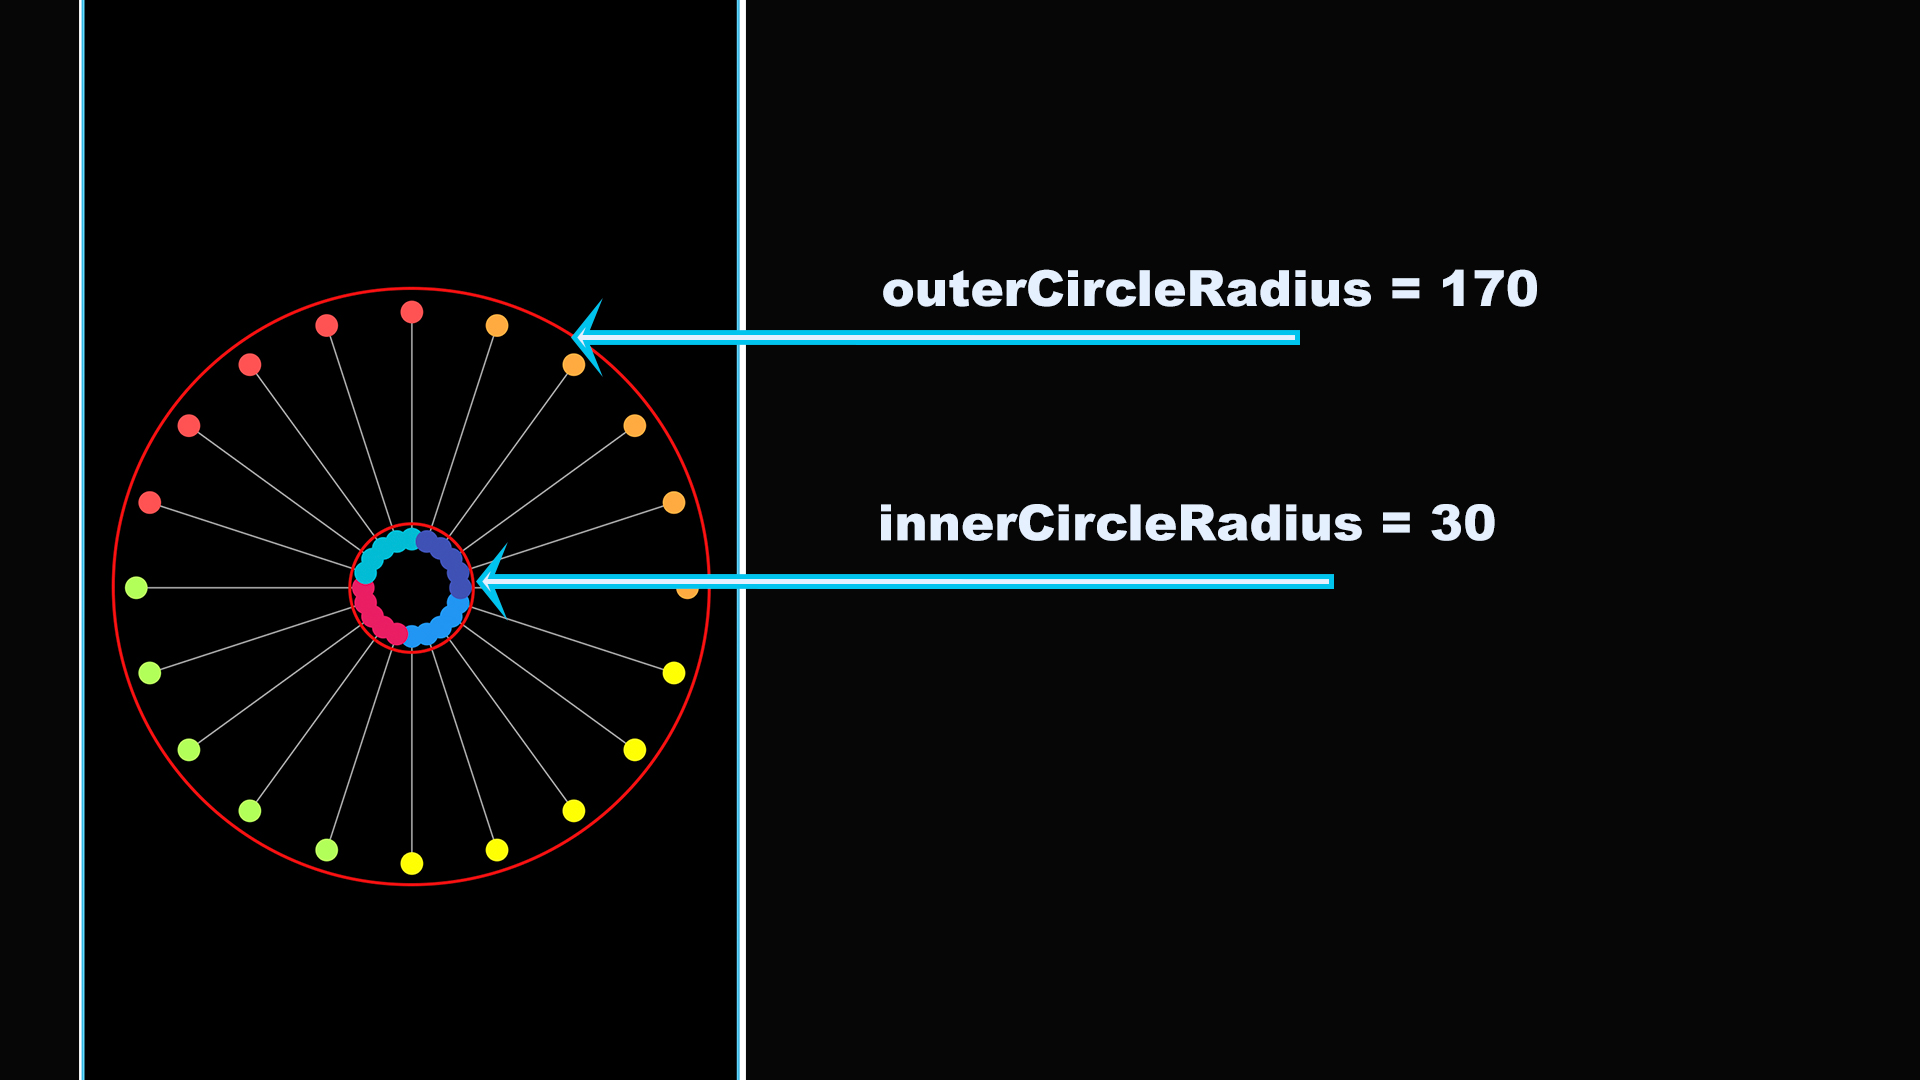
At the end on point 5, we have mentioned number of small cricles we need. At the very last line of the above picture we see Offset.zero sent for size.center() method, which tells us we will start animation at the center of our screen.
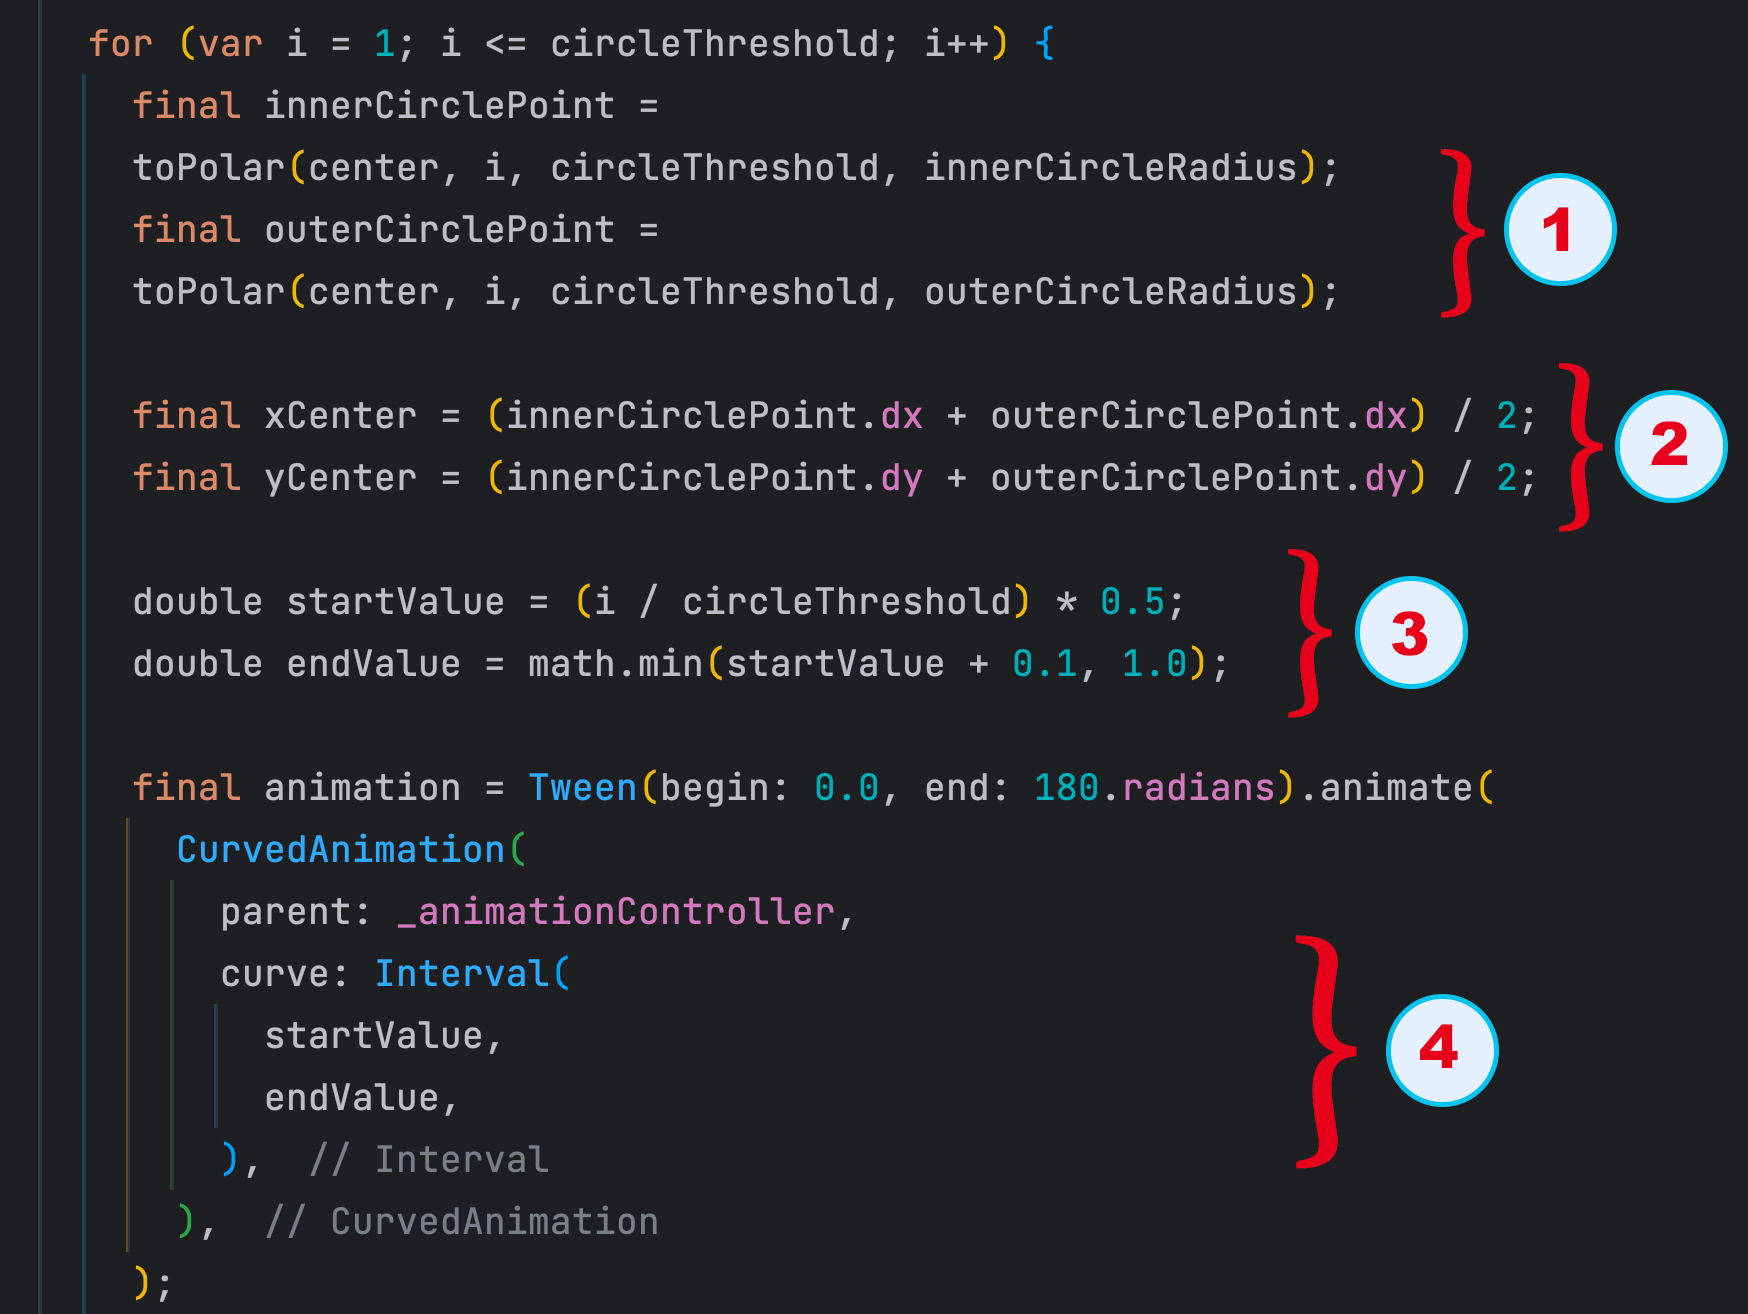
In the above image, in point 1, we are returning some points and these points are where small circles would be located (refer first image on the left). innerCirclePoint holds the points for first circle and outerCirclePoint holds the points for second circle.
Here we also see CurvedAnimation() class which gives us a non-linear animation. This non-linear animation happens between 0 and 180 degrees using Tween. Tween takes animation values and sends to Flutter framework for interpolation.
Here we are Tweening between angle values. If it's a color animation you would Tween between color values.
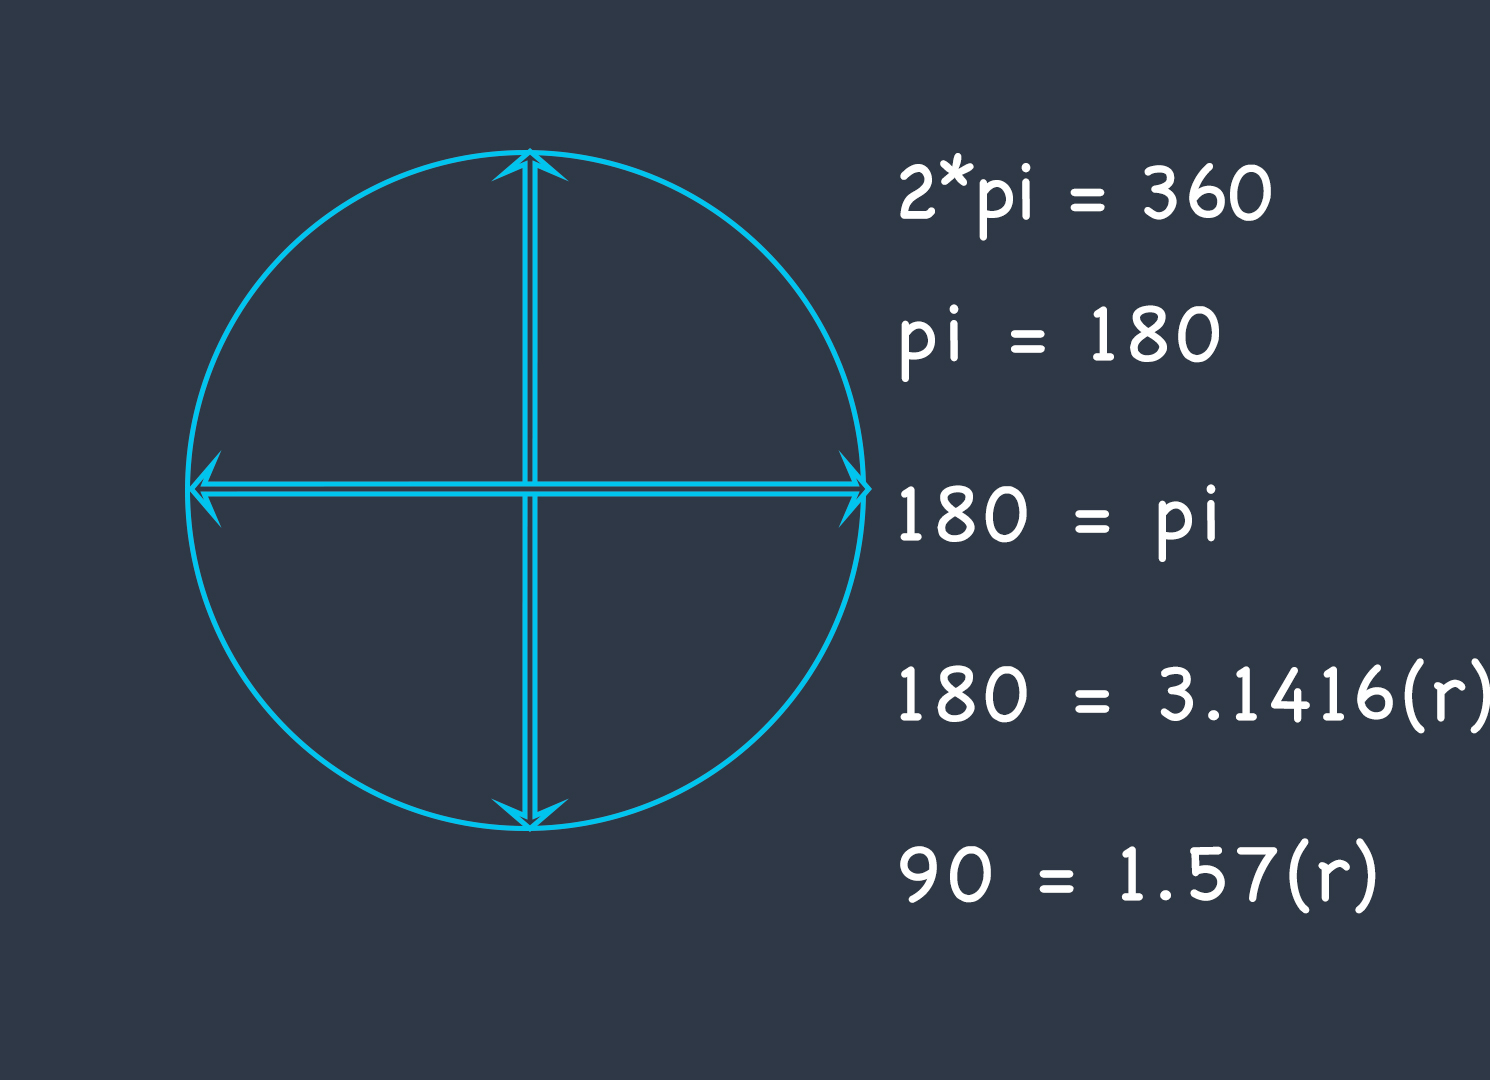
Since we are doing rotation we need to mention in radians. In each animaiton cycle, we rotate upto 180 degree. Later we will see we have a rotate function, that takes radians as an unit.
It's also important to note that, this class needs _animationController. Next comes the Interval() method. This method defines how much animation of angles we should do? Even though we said angle of animation should be from 0 to 180 degrees, but in each iteration the amount of rotation is different. Rotation happens based on angles. Angles are controlled by the value passed to Interval() method.
At the same time, we see that Interval()'s end value is same as upperBound value in the AnimationController class.
Next comes the heart of the animation
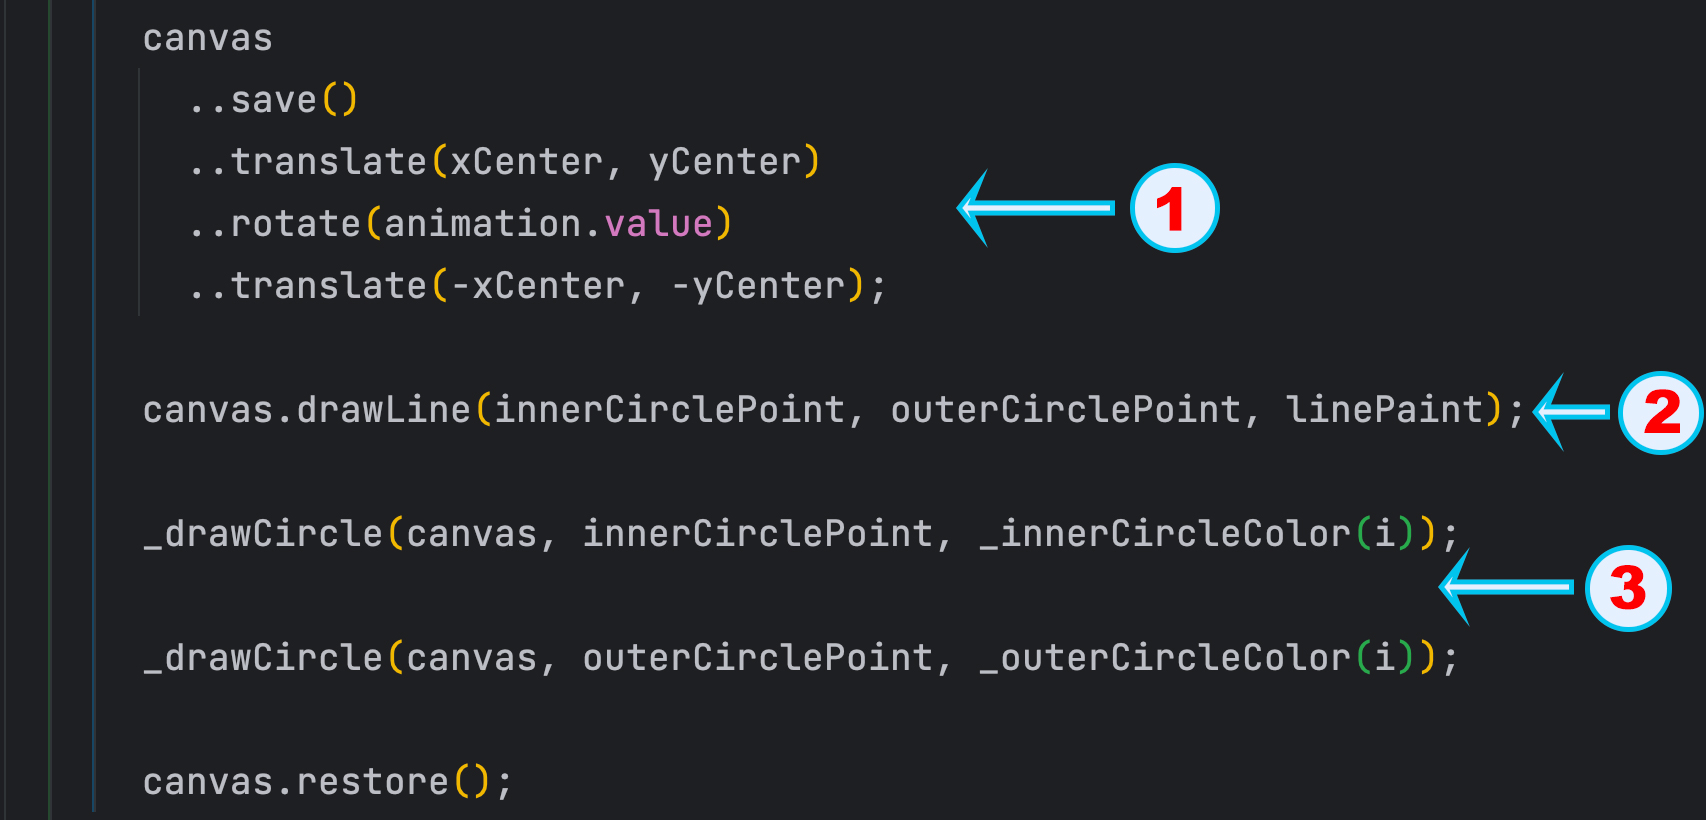
canvas.save() (in this case we have used cascade operator) is responsible for saving the animation so that the UI could be updated with the current state in point 1.
canvas is called whenever the object needs to paint. This canvas object provides all the resources of the drawing like color, lines and shapes.
We also see canvas.translate() method, this method is reponsible for moving objects on the screen on the x and y axis. Here we move based on the center location. In general, Translation is a matrix operation on the given axis. Here we have only two axis x and y.
Then we have canvas.rotate(), because of this we see angular movement on the screen. If you remove that, you will see nothing is changing at all. If you remove canvas.rotate(), the animation is like dead. This rotation takes radians value for angle.
Then we called canvas.drawLine() function is drawing the object based on canvas.save(). In here we are drawing a line. This is the line that connects between two small circles in point 2.
After that, at last we have _drawCircle() to draw the circles.
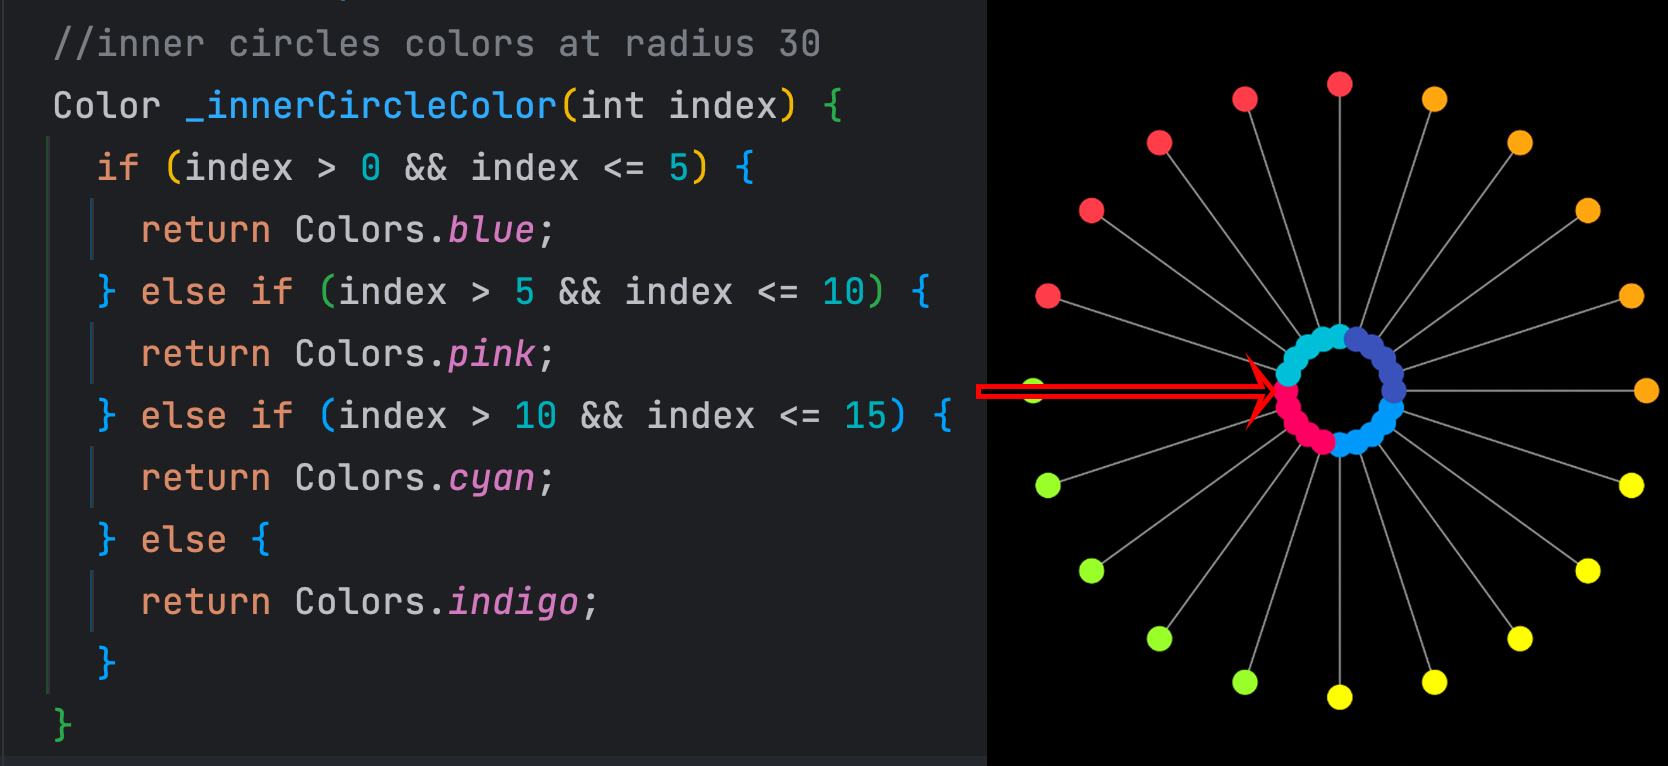
Now let's take a lok how the small cirlces in the inner radius (innerCirclesRadius=30) work.
The above method gets called from
_drawCircle(canvas, innerCirclePoint, _innerCircleColor(i));
As you see we are calling _innerCircleColor(). All it does is assiging different colors to different circles based on the index number. Different index means different colors.
The same goes for _outerCircleColor. It's important to note that the small cirlce's radius is 7.
Now we have created two helper function using dart extensions.
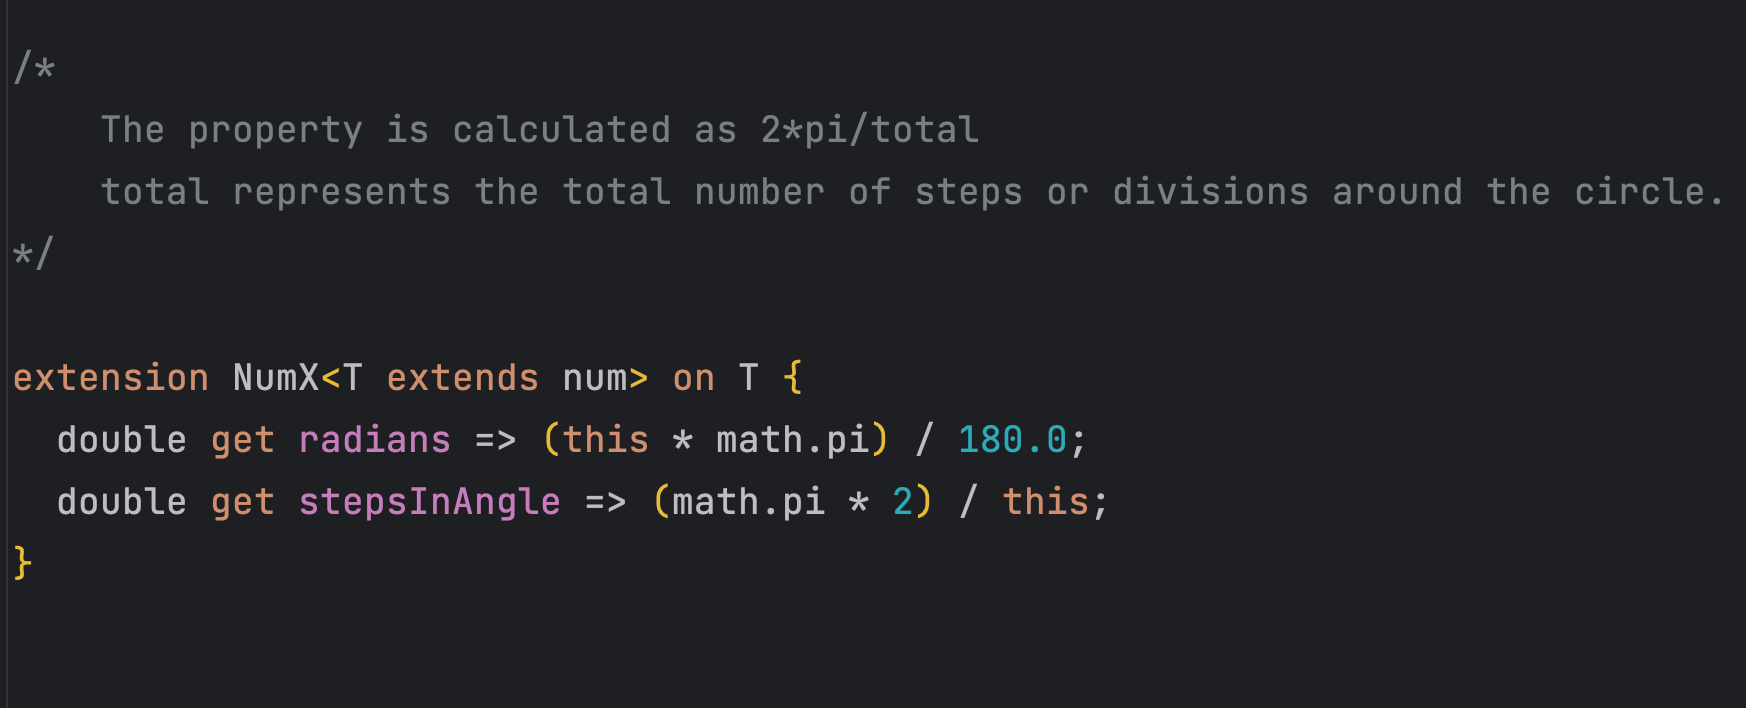
Dart extension allows to create extra functions on object. Here we created an extension NumX() which would work on double number.
This extension allows us to work on double number using radians and stepsInAngle object getter. The secton object stepInAngle makes a circle divided into many sections.
The property stepsInAngle is calculated as 2*pi/this. This represents the total number of steps or divisions around the big circle. It should be passed to the getter stepsInAngle.
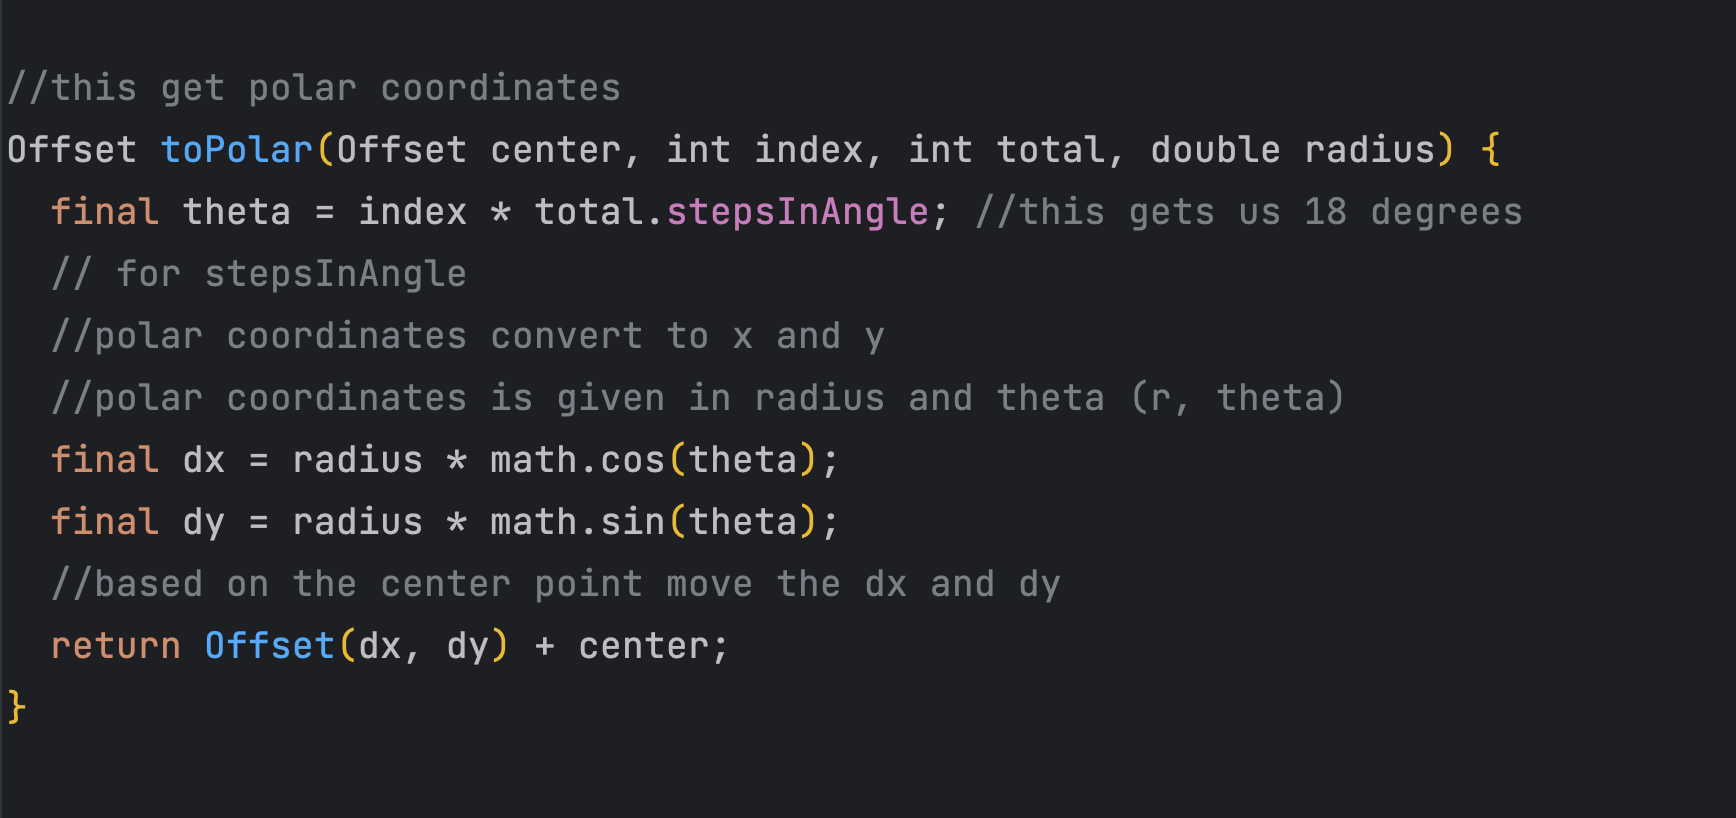
This method toPolar() returns Offset(meaning x, y value). Before it returns Offset, it does a few calculations.
First part is getting the angle for a small cricle's location on the outer circumference. Since cirlces are placed based on index, so each time there's a new index, a new circle is placed with a new angle. But this angle must be calculated. This is calculated using our dart extension along with total circle number and index passed to toPolar() method.
In the method there's a relationship between polar coordinates (r, theta) and cartesian coordinates (x, y). Within the function body, we have converted the polar coordinates to cartesian coordinates.
When you are given radius and theta, you are given polar coordinate. Because we want an exact point on the canvas, we converted this to cartesian coordinate by using math.cos(theta) and math.sin(theta).
 Get the code