Flutter local notification with scheduling and notification with local storage sqflite. This app shows notification in certain intervals. It's more like a task management app, where you create a task and that could be notified in certain times later by notification. This text based tutorial upgrade the flutter video tutorial which supports 3.7.0 flutter version.
Part 1
Part 2
Part 3
1. iOS Settings
10. Navigate to different route
11. Passing payload
12. Upgrade the app
Get the complete code on buyme coffee. The code in this link is flutter 3.4 version.
The big picture
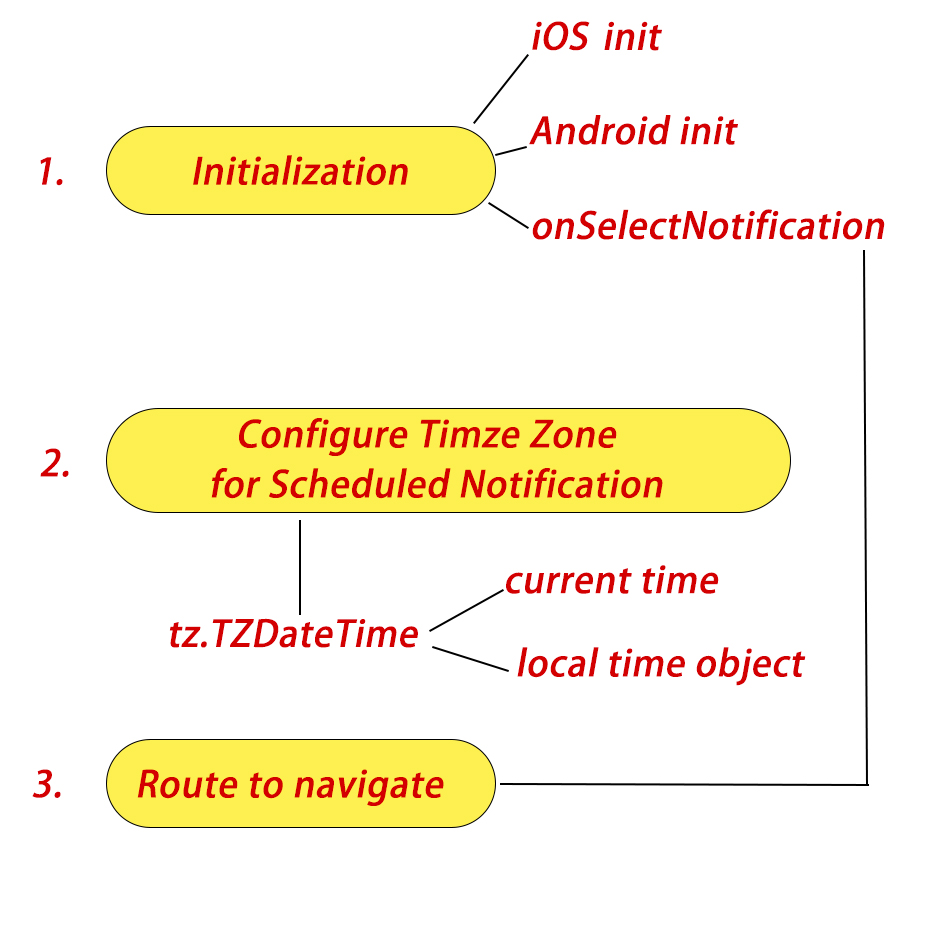
1. iOS Settings
In your project folder go to your ios folder and find AppDelegate.Swift
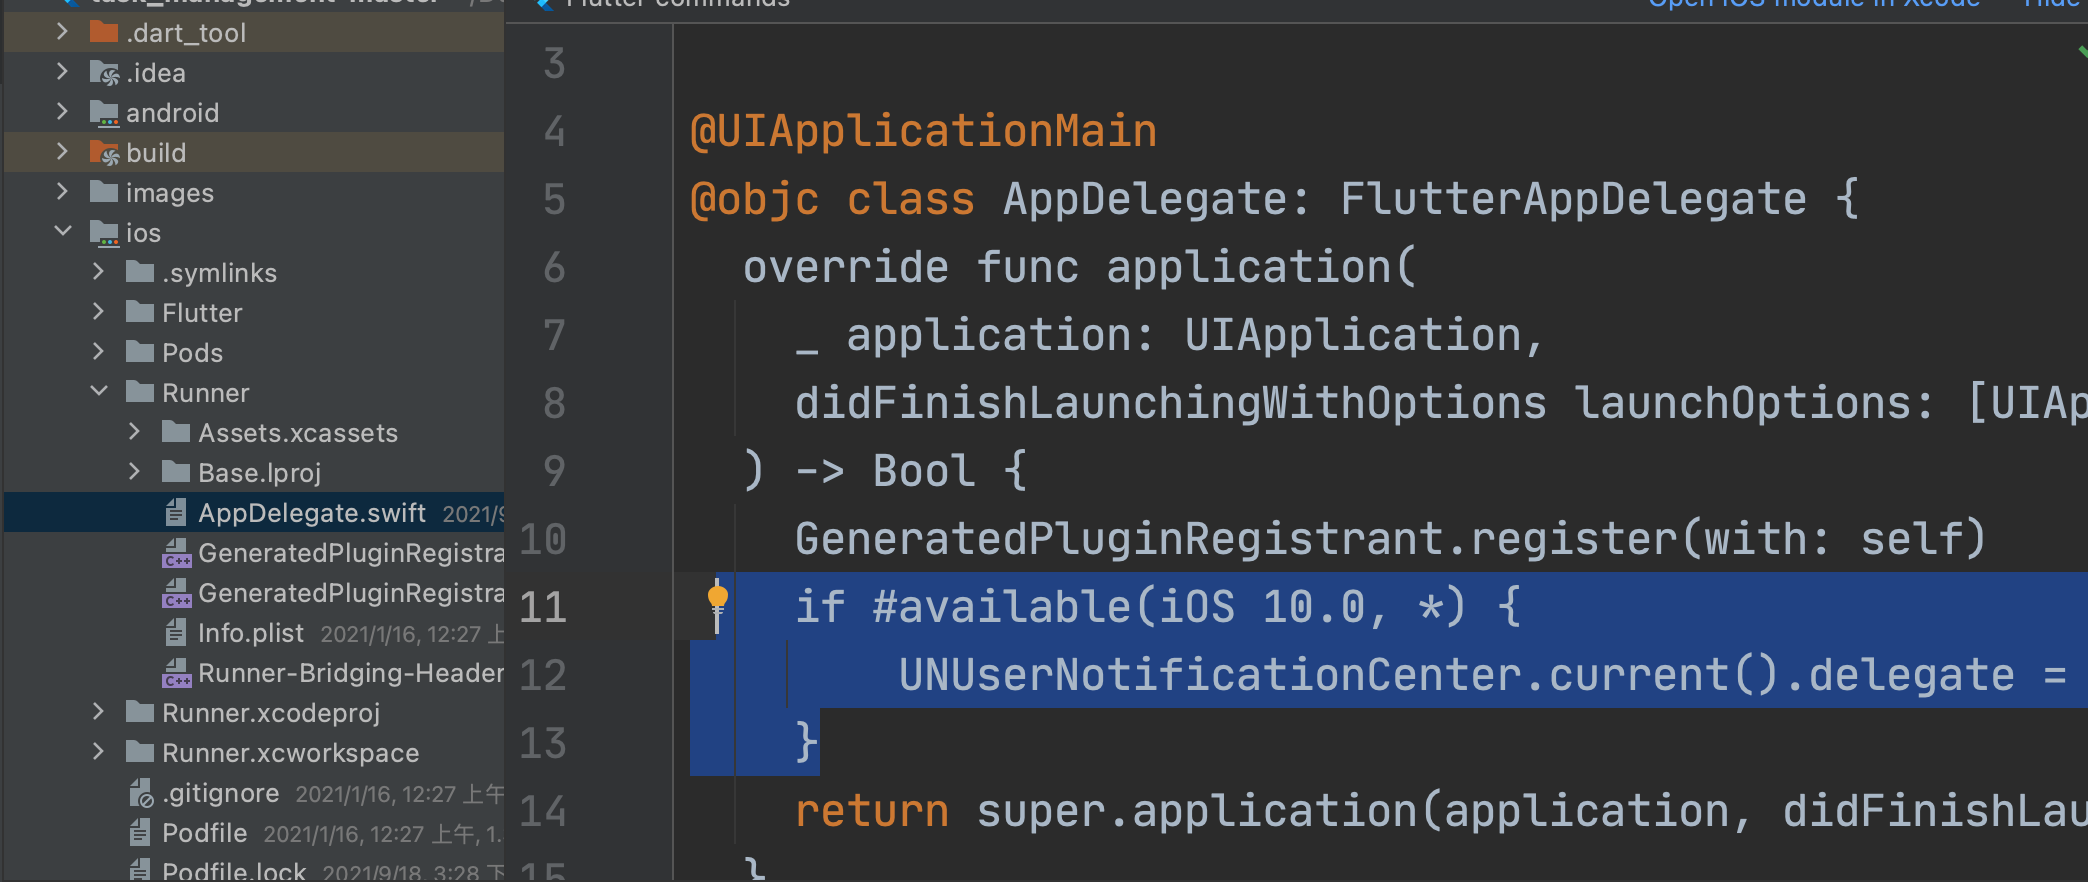
and add a code like above the picture. Add the code below
   if #available(iOS 10.0, *) {
        UNUserNotificationCenter.current().delegate = self as? UNUserNotificationCenterDelegate
    }
With the above code you are done with basic iOS settings.
2. Work on Initialization
First you need to instantiate the plugin like below
  FlutterLocalNotificationsPlugin
  flutterLocalNotificationsPlugin =
      FlutterLocalNotificationsPlugin();
then we will use flutterLocalNotificationsPlugin for IOSInitializationSettings, AndroidInitializationSettings and passing a callback function to onSelectNotification.
First take a look at an important callback function for iOS below
onDidReceiveLocalNotification
3. For older version of iOS
  Future onDidReceiveLocalNotification(
      int id, String title, String body, String payload) async {
    // display a dialog with the notification details, tap ok to go to another page
    showDialog(
      //context: context,
      builder: (BuildContext context) => CupertinoAlertDialog(
        title: Text(title),
        content: Text(body),
        actions: [
          CupertinoDialogAction(
            isDefaultAction: true,
            child: Text('Ok'),
            onPressed: () async {
              Navigator.of(context, rootNavigator: true).pop();
              await Navigator.push(
                context,
                MaterialPageRoute(
                  builder: (context) => SecondScreen(payload),
                ),
              );
            },
          )
        ],
      ),
    );
  }
Must be called from initillization functions ios. But this is only necessary if your ios version older than 10.
For iOS you can call it from DarwinInitializationSettings()
Use it like below
    final DarwinInitializationSettings initializationSettingsIOS =
    DarwinInitializationSettings(
        requestSoundPermission: false,
        requestBadgePermission: false,
        requestAlertPermission: false,
        onDidReceiveLocalNotification: onDidReceiveLocalNotification
    );
The above code is the latest iOS initialization settings which relies on a constructor name DarwinInitializationSettings
And then for android add the below code
 final AndroidInitializationSettings initializationSettingsAndroid =
     Android InitializationSettings("appicon);
The above code with make sure it will run on Android version. For android version we must mention the app icon name. The app icon name could be anything you like. But there must be an image for that name.
And then call IOSInitializationSettings from InitializationSettings like below
 final InitializationSettings initializationSettings =
        InitializationSettings(
       iOS: initializationSettingsIOS,
       android:initializationSettingsAndroid,
    );
and then call the "initialize" function from flutterLocalNotificationsPlugin like below
 await flutterLocalNotificationsPlugin.initialize(
        initializationSettings,
        onSelectNotification: selectNotification);
Do remember that, selectNotification function is a callback function which means it will get called later. Once again callback functions are functions that get called later. When somethigns happens later. In our case selectNotification will be called like say 5 seconds or 5 minutes later.
Now let's see the complate initialization function of flutterLocalNotificationsPlugin
  FlutterLocalNotificationsPlugin
  flutterLocalNotificationsPlugin =
      FlutterLocalNotificationsPlugin(); //

  initializeNotification() async {
    //tz.initializeTimeZones();
   // this is for latest iOS settings
    final DarwinInitializationSettings initializationSettingsIOS =
    DarwinInitializationSettings(
        requestSoundPermission: false,
        requestBadgePermission: false,
        requestAlertPermission: false,
        onDidReceiveLocalNotification: onDidReceiveLocalNotification
    );

 final Android InitializationSettings initializationSettingsAndroid =
     Android InitializationSettings("appicon);

    final InitializationSettings initializationSettings =
        InitializationSettings(
       iOS: initializationSettingsIOS,
       android:initializationSettingsAndroid,
    );
    await flutterLocalNotificationsPlugin.initialize(
        initializationSettings,
        onSelectNotification: selectNotification);

  }
Before we start to use the notification we must get permission from users in iOS. Use the code below to get permission
4. Request Permisions for iOS
  void requestIOSPermissions() {
    flutterLocalNotificationsPlugin
        .resolvePlatformSpecificImplementation<
        IOSFlutterLocalNotificationsPlugin>()
        ?.requestPermissions(
      alert: true,
      badge: true,
      sound: true,
    );
  }
Call the requestIOSPermissions() inside your initialize method.
Now take a look at selectNotification callback fuction for onSelectNotification. We need to implement it inside initialization settings. With this function we would be able to go to another page once the notification arrives by tapping on the notification tab.
We implement it like below
For on tap onSelectNotification
  Future selectNotification(String payload) async {
    if (payload != null) {
      print('notification payload: $payload');
    } else {
      print("Notification Done");
    }
     Get.to(()=>SecondScreen(payload));
  }
As you can see it takes us to new page. Awesome. Here we use GetX package for navigation. With GetX you don't need to pass the context. It becomes much easier.
This callback function also takes the payload (the infomation you want to send after on tap to a new route or page).
We are done with settings. Now we can create another function for showing notification on the screen when the time arraive.
5. Scheduled Notification
   scheduledNotification() async {
     await flutterLocalNotificationsPlugin.zonedSchedule(
         0,
         'scheduled title',
         'theme changes 5 seconds ago',
         tz.TZDateTime.now(tz.local).add(const Duration(seconds: 5)),
         const NotificationDetails(
             android: AndroidNotificationDetails('your channel id',
                 'your channel name', 'your channel description')),
         androidAllowWhileIdle: true,
         uiLocalNotificationDateInterpretation:
             UILocalNotificationDateInterpretation.absoluteTime);

   }
The above function is the most basic scheduled notification which implements flutterLocalNotificationsPlugin.zonedSchedule
Here we get a notification after 5 seconds once the app has been initialized. You need to call scheduledNotification() from somewhere in your app.
The line about time TZDateTime is quiet important.
tz.TZDateTime.now(tz.local).add(const Duration(days:0, minutes: 0, seconds: 5)),
You can only pass constants to it's duration parameters. So we passed 5(a constant) seconds to it. If you try to send a variable you will get error like
Error: Not a constant expression.
This also means that, if you want to pass a time from somewhere else, it won't work. You will get the above error.
Of course, you can change the Duration function and send dynamic time.
Here you can add a property to make it periodically or in fixed schedule notification.
matchDateTimeComponents: DateTimeComponents.timeThis property makes sure that, the notification would pop up periodically or in a fixed time manner or daily.
Now instead of .time you can use .DayOfWeekAndTime. This would show the notification every week on cerntain time and day.
matchDateTimeComponents: DateTimeComponents.DayOfWeekAndTime
6. Immediate Notification
Instant or immediate notification could be match together on when you tap on a button. Just call the below function from the onTap() event on your button.
  displayNotification({required String title, required String body}) async {
    print("doing test");
    var androidPlatformChannelSpecifics = new AndroidNotificationDetails(
        'your channel id', 'your channel name', 'your channel description',
        importance: Importance.max, priority: Priority.high);
    var iOSPlatformChannelSpecifics = new IOSNotificationDetails();
    var platformChannelSpecifics = new NotificationDetails(
        android: androidPlatformChannelSpecifics, iOS: iOSPlatformChannelSpecifics);
    await flutterLocalNotificationsPlugin.show(
      0,
      'You change your theme',
      'You changed your theme back !',
      platformChannelSpecifics,
      payload: 'It could be anything you pass',
    );
  }
The above code will also repsone and navigate to a different page, when you tap on the notification.
Call this function from your initialize function. Take a look at the initialize function now
 initializeNotification() async {
 final IOSInitializationSettings initializationSettingsIOS =
     IOSInitializationSettings(
         requestSoundPermission: false,
         requestBadgePermission: false,
         requestAlertPermission: false,
         onDidReceiveLocalNotification: onDidReceiveLocalNotification
     );

    final InitializationSettings initializationSettings =
        InitializationSettings(
       iOS: initializationSettingsIOS,
    );

    await flutterLocalNotificationsPlugin.initialize(
        initializationSettings,
        onSelectNotification: selectNotification
    );
  }
7. Android Settings
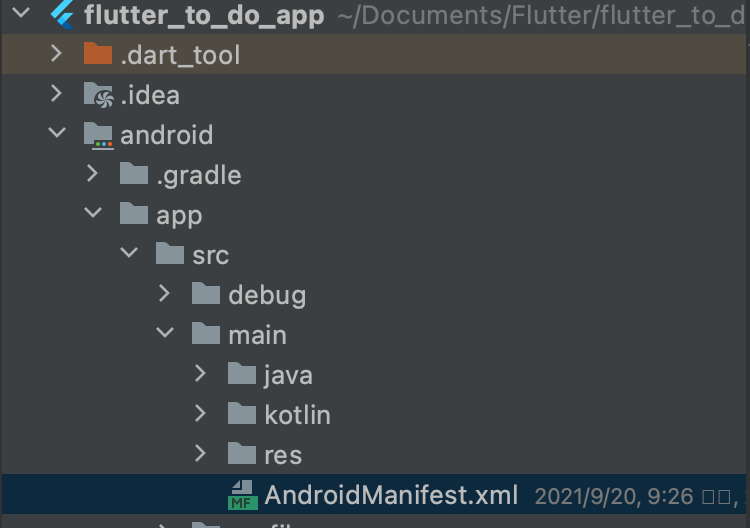
You need to find the AndroidManifest.xml file and make the necessary changes. You need to provide the below settings
<manifest xmlns:android="http://schemas.android.com/apk/res/android"
    package="com.example.flutterappnoti">

    <!-- The INTERNET permission is required for development. Specifically,
         flutter needs it to communicate with the running application
         to allow setting breakpoints, to provide hot reload, etc.
    -->
    <uses-permission android:name="android.permission.INTERNET"/>
    <uses-permission android:name="android.permission.VIBRATE" />
    <uses-permission android:name="android.permission.RECEIVE_BOOT_COMPLETED"/>
And then app icon for android. Without setting app icons you will get crash
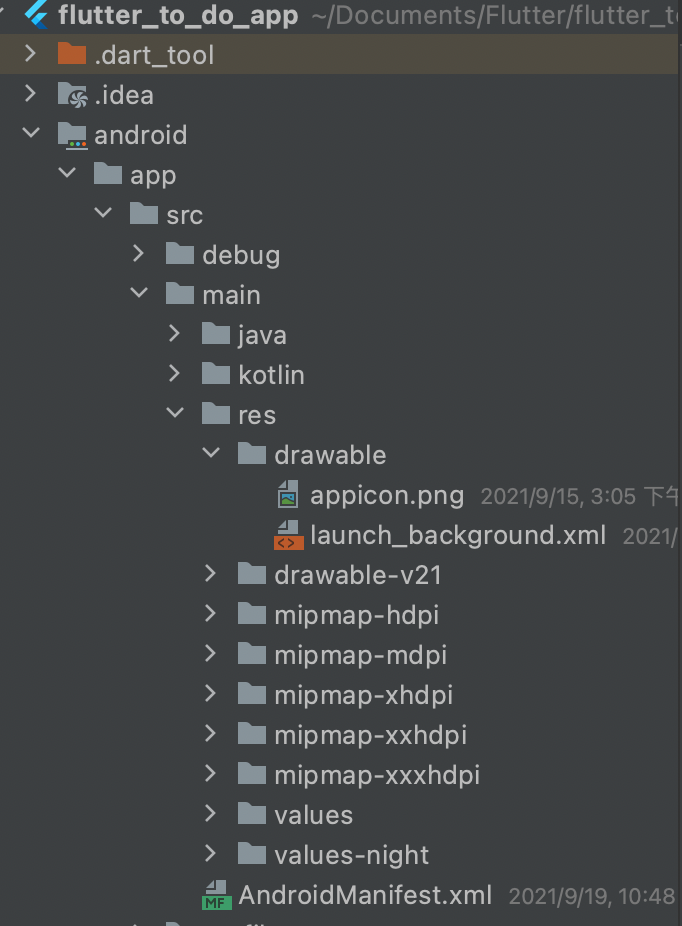
Set it inside the drawable folder
Warnings for Android users
You should also make sure that, you installed java and jdk on your machines to run android emulator. If your java and jdk environment paths are not defined, you won't be able to run android emulator.
If you get error saying too many positional argument 2 expectd but 3 found for onDisplayNotification on Android try to remove "your channel description" this field for Android
8. BehaviorSubject
BehaviorSubject is a controller(Stream), you can add items to it and emit items from it to a listener. So all it does is, wait for events(like notifications) to happen and capture the events and forward them to a listener.
BehaviourSubject is important if you want to click on the the notification and go to another page or to a route with payload.
Once you click on the notificatoin tab, BehaviorSubject will capture the lastest(this) notification and it's related info like payload string (the info you want to send with the notifications).
You can create an instance like below
  final BehaviorSubject<String> selectNotificationSubject =
  BehaviorSubject<String>();
Now selectNotificationSubject will have some properties that you can use like
selectNotificationSubject.add(payload);
selectNotificationSubject.stream.listen(()=>);
So selectNotificationSubject.add should be called inside onSelectNotification callback. We know that, onSelectNotification gets called duration the initialization of notifications.
 onSelectNotification: (String payload) async {
          if (payload != null) {
            debugPrint('notification payload: ' + payload);
          }
          selectNotificationSubject.add(payload);
});
Now with this, payload would be added for the next route. And listener will receive this event for executing later (based on your notification time).
And later BehaviourSubject selectNotificationSubject instance would send the added payload to the listener.
So if you want to tap on notification message and go to another page, you must implement BehaviorSubject. And the process is first add the items to this on onSelectNotififcation callback and then call for listening from the first initialization.
9. Configure Local Time Zone
You need to configure local time zone if you want to trigger a notification on certain time later. For this you must access the local time zone from native layer.
flutter_native_timezone: ^1.0.10You need to install this package and you need to import the three packages
import 'package:flutter_native_timezone/flutter_native_timezone.dart';
import 'package:timezone/data/latest.dart' as tz;
import 'package:timezone/timezone.dart' as tz;
Then in your initialization you put like below
tz.initializeTimeZones();
final String timeZoneName = await FlutterNativeTimezone.getLocalTimezone();
tz.setLocalLocation(tz.getLocation(timeZoneName));
The first line does the necessary settings for the time zone and second line get the time zone from the native layer of the device and third line sets the time.
10. Navigate to different route
Now you will see how to navigate to different routes. You can use selectNotification call back to do that. In our case the body is selectNotification. We can do a conditional check to navigate to different routes
   Future selectNotification(String payload) async {
    if (payload != null) {
      //selectedNotificationPayload = "The best";
      //selectNotificationSubject.add(payload);
      print('notification payload: $payload');
    } else {
      print("Notification Done");
    }

   if(payload=="Theme Changed"){
      //going nowhere
      }else{
        Get.to(()=>SecondScreen(payload));
      }
  }
11. Pass payload
Payload is always gotten from the functions you call for notification. In our case, we are calling displayNotification and scheduledNotification from our front end fluter code.
They must carry and pass payload from flutter caller to callee. See the callee
  scheduledNotification(int hour, int minutes,Task task) async {
    await flutterLocalNotificationsPlugin.zonedSchedule(
      task.id,task.title,task.note,
      ...........................................................
      ..........................................................
      matchDateTimeComponents: DateTimeComponents.time,
      payload: "${task.title}|"+"${task.note}|"+"${task.startTime}|",
    );
}
And the other one
  displayNotification({@required String title, @required String body}) async {
    ....................................................................
   ....................................................................
    await flutterLocalNotificationsPlugin.show(
      0,
      'You change your theme',
      'You changed your theme back !',
      platformChannelSpecifics,

      payload: title,
    );
  }
So you see how we pass the paylaod.
Our callback function onSelectNotification also gets the same payload. So you can get them in this callback function and send anywhere you want to navigate for.
   Future selectNotification(String payload) async {
    if (payload != null) {
      print('notification payload: $payload');
    } else {
      print("No plaload");
    }

      if(payload=="Theme Changed"){
      }else{
       Get.to(()=>SecondScreen(payload));
      }
  }
This is how you can pass payload to a different page or route
12. Upgrading the app
If you need to upgrade the app, wanna run your app on flutter stable version. Go ahead and upgrade the app using the below commands
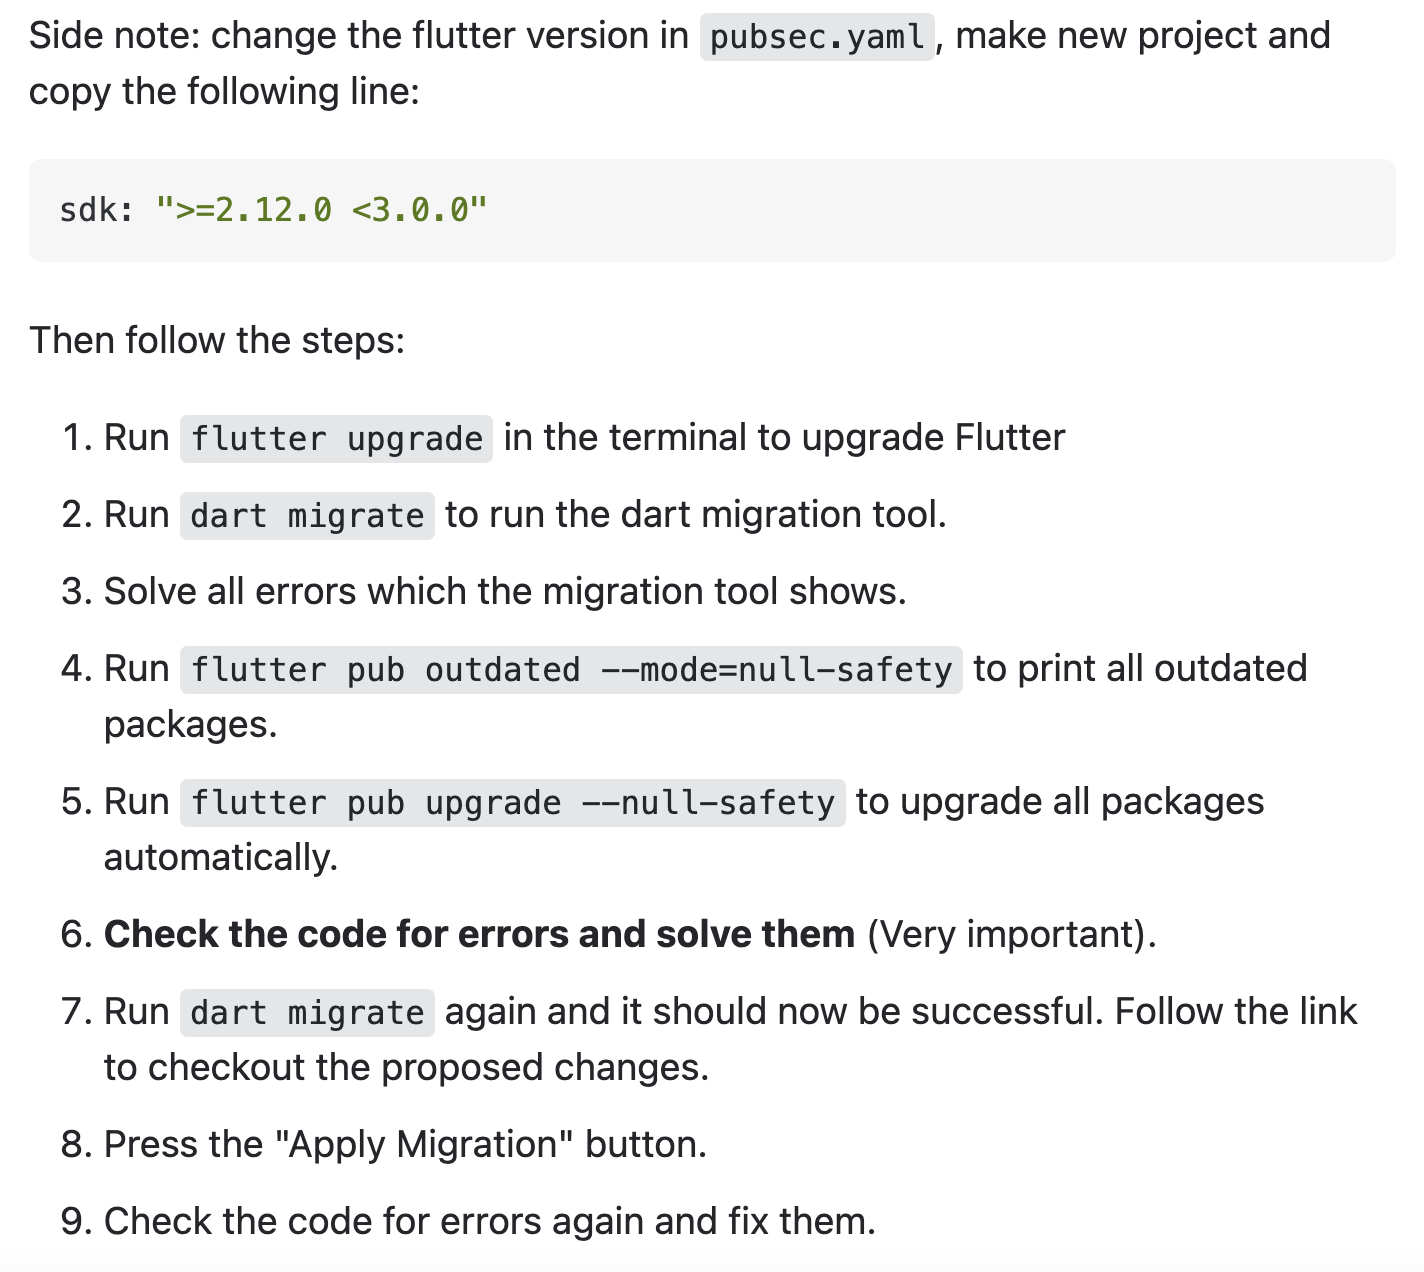
And then make sure that, you have the following versions.
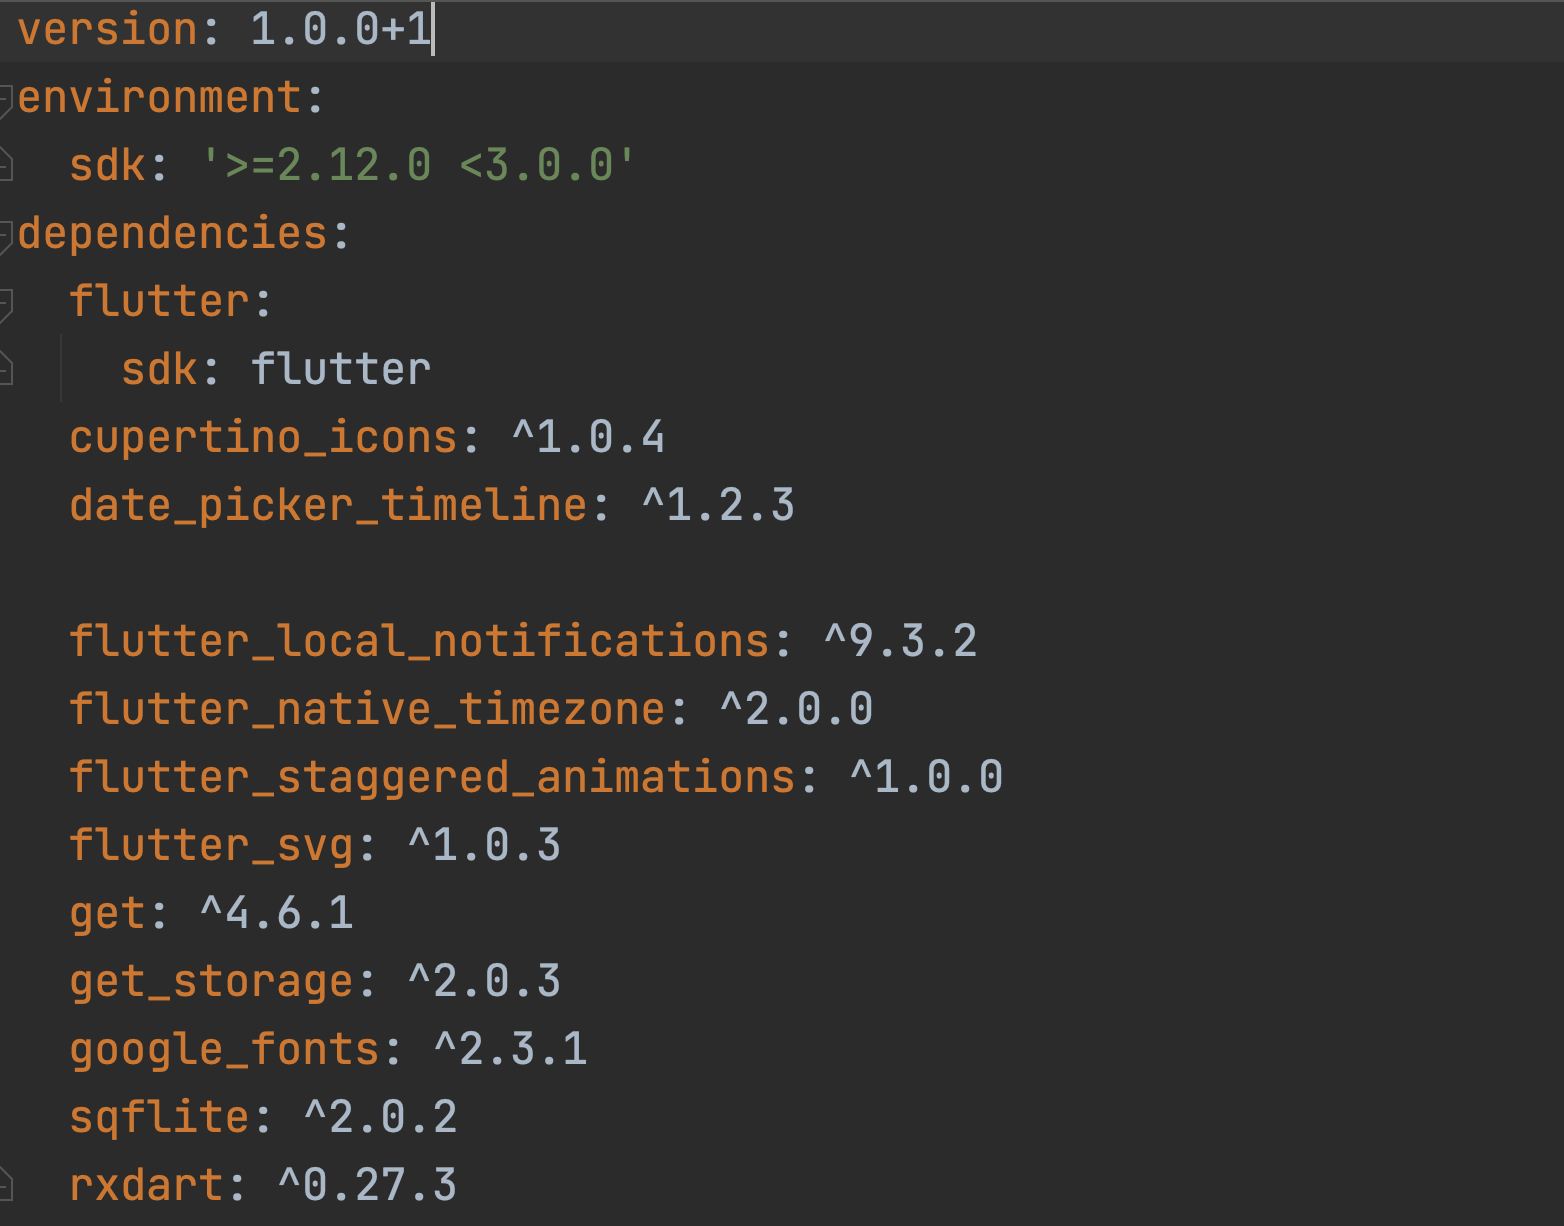
With the above plugin vesions you will have the latest version of flutter on your side. We also removed flutter_icons plugin.
And the make sure you do the following changes in your app.
12.1 Additional changes
In task_controller.dart make the following changes
final RxList<Task> taskList = List<Task>.empty().obs;And
  Future<void> addTask({required Task task}) async {
     await DBHelper.insert(task);
  }
And your notifications_services.dart onDidReceiveLocalNotification() function, use context:Get.context!
  Future onDidReceiveLocalNotification(
      int id, String? title, String? body, String? payload) async {
    // display a dialog with the notification details, tap ok to go to another page
    showDialog(
      context: Get.context!,
      builder: (BuildContext context) => CupertinoAlertDialog(
        title: Text(title!),
        content: Text(body!),
        actions: [
          CupertinoDialogAction(
            isDefaultAction: true,
            child: Text('Ok'),
            onPressed: () async {
              Navigator.of(context, rootNavigator: true).pop();
              await Navigator.push(
                context,
                MaterialPageRoute(
                  builder: (context) => SecondScreen(payload),
                ),
              );
            },
          )
        ],
      ),
    );
  }
And in the same file you should remove the necessary arguments. In android studio, the unnecessary arguments are underlined and remove them.
And through out the if you are using icons from flutter_icons, remove those icons and use any custom icons. You should be good to go
12. Errors and Solutions
1. LocationNotFoundException (Location with the name "GMT" doesn't exist)
Solution 1
Are you working on an emulator ? By default, there is no timezone set. So you have to choose one so the GMT will not be null.
Have you tried to change the timezone in phone's settings ?
I was working on emulator and changing timezone from United States to France stopped crashing my app
Solution 2
import 'package:timezone/data/latest_all.dart' as tz;
instead of
import 'package:timezone/data/latest.dart' as tz;
Make sure you are importing the right way and right package
Solution 3
Try not to use Apple Sillicon Android Emulator
static Future configureLocalTimeZone() async {
tz.initializeTimeZones();
final String timeZoneName = await FlutterNativeTimezone.getLocalTimezone();
Logger.log('Timezone: $timeZoneName', className: '$AppConfig');
try {
tz.setLocalLocation(tz.getLocation(timeZoneName));
} catch () {
// Failed to get timezone or device is GMT or UTC, assign generic timezone
const String fallback = 'Africa/Accra';
Logger.log('Could not get a legit timezone, setting as $fallback',
className: '$AppConfig');
tz.setLocalLocation(tz.getLocation(fallback));
}
}
You can also try the above code for the solution
Issues
With new version of flutter, you may need to change the primaryColor like below
'primaryColor' doesn't work. Instead use 'colorSchemeSeed'. This works for both light and dark mode. primarySwatch is also a alternative, but it only works for light mode, not dark.
Error and Solutions
Int is not subtype of String
In the above error case the line
title = json['title']; title = json['title'].toString();Other fixes