Laravel passport and token for app
Install Laravel
First you need to install Laravel in your machine. Run the below command and it will create folder name laravel and install laravel inside it
composer create-project --prefer-dist laravel/laravelAnd then make sure that, you created your database and updated your env file accordingly.
After that give permission to laravel folders to be written by apache and laravel
chmod -R 775 storage/
chmod -R 775 bootstrap/cache

chown -R apache storage/
chown -R apache bootstrap/cache
And then run
php artisan migrate
Install Laravel Passport
Next we need to have laravel passport using composer. To do it, run the below command
composer require laravel/passport
Run the artisan command
php artisan migrateThe above command will create new tables for us to store client id and token.
And run the below command to install passport
php artisan passport:installThe above command will generate token and Id for the laravel.
Laravel passport setup
Bind laravel passport with user model . In your user model import laravel passport as
use Laravel\Passport\HasApiTokens;
And then add HasApiTokens inside user class.
<?php

namespace App\Models;

use Illuminate\Contracts\Auth\MustVerifyEmail;
use Illuminate\Database\Eloquent\Factories\HasFactory;
use Illuminate\Foundation\Auth\User as Authenticatable;
use Illuminate\Notifications\Notifiable;
use Laravel\Passport\HasApiTokens;

class User extends Authenticatable
{
    use HasApiTokens, HasFactory, Notifiable;

    /**
     * The attributes that are mass assignable.
     *
     * @var array
     */
    protected $fillable = [
        'name',
        'email',
        'password',
    ];

    /**
     * The attributes that should be hidden for arrays.
     *
     * @var array
     */
    protected $hidden = [
        'password',
        'remember_token',
    ];

    /**
     * The attributes that should be cast to native types.
     *
     * @var array
     */
    protected $casts = [
        'email_verified_at' => 'datetime',
    ];
}
And then we need to add the below info in the laravel config/auth.php
<?php


return [
    .....
    'guards' => [
        'web' => [
            'driver' => 'session',
            'provider' => 'users',
        ],
        'api' => [
            'driver' => 'passport',
            'provider' => 'users',
        ],
    ],
    .....
]
Create routes
Then we will go to our routes/api.php add our end point. We will add two post routes
<?php

use Illuminate\Http\Request;
use Illuminate\Support\Facades\Route;

use App\Http\Controllers\API\UserController;


/*
|--------------------------------------------------------------------------
| API Routes
|--------------------------------------------------------------------------
|
| Here is where you can register API routes for your application. These
| routes are loaded by the RouteServiceProvider within a group which
| is assigned the "api" middleware group. Enjoy building your API!
|
*/

Route::post('register', [UserController::class, 'register']);
Route::post('login', [UserController::class, 'login']);
Create controller
So that means we need to create controller for user
php artisan make:controller Api/UserController
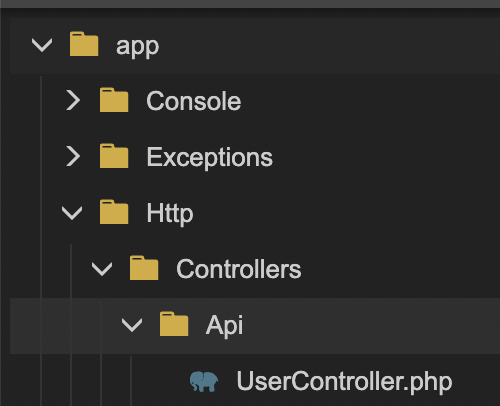
Then it will create a UserController in the app/Http/Controllers/Api folder. It will create a new folder name Api
Then we will add two methods to UserController.php, login and register methods
<?php

namespace App\Http\Controllers\Api;
use App\Http\Controllers\Controller;
use Illuminate\Http\Request;
use App\Models\User;
use Illuminate\Support\Facades\Auth;
use Illuminate\Support\Facades\Validator;

class UserController extends Controller
{
    public function register(Request $request)
    {
        $validator = Validator::make($request->all(), [
            'name' => 'required',

            'email' => 'required|unique:users',

            'password' => 'required|min:6',
        ], [
            'name.required' => 'The first name field is required.',
            'email.required' => 'The last name field is required.',
        ]);

        if ($validator->fails()) {
            return response()->json(['errors' => "Couldn't validate"], 403);
        }
        $user = User::create([
            'name' => $request->name,

            'email' => $request->email,

            'password' => bcrypt($request->password),
        ]);

        $token = $user->createToken('RestaurantCustomerAuth')->accessToken;


        return response()->json(['token' => $token, 'name'=>$user->name ], 200);
    }

        public function login(Request $request)
    {
        $validator = Validator::make($request->all(), [
            'email' => 'required',
            'password' => 'required|min:6'
        ]);

        if ($validator->fails()) {
            return response()->json(['errors' => "Errors"], 403);
        }

        $data = [
            'email' => $request->email,
            'password' => $request->password
        ];

        if (auth()->attempt($data)) {
            $token = auth()->user()->createToken('RestaurantCustomerAuth')->accessToken;


            return response()->json(['token' => $token, 'name'=>auth()->user()->name], 200);
        } else {

            return response()->json([
                'errors' => "Something went wrong"
            ], 401);
        }
    }

}
Test with postman
With this we are pretty much done setting up our token generation mechanism in laravel

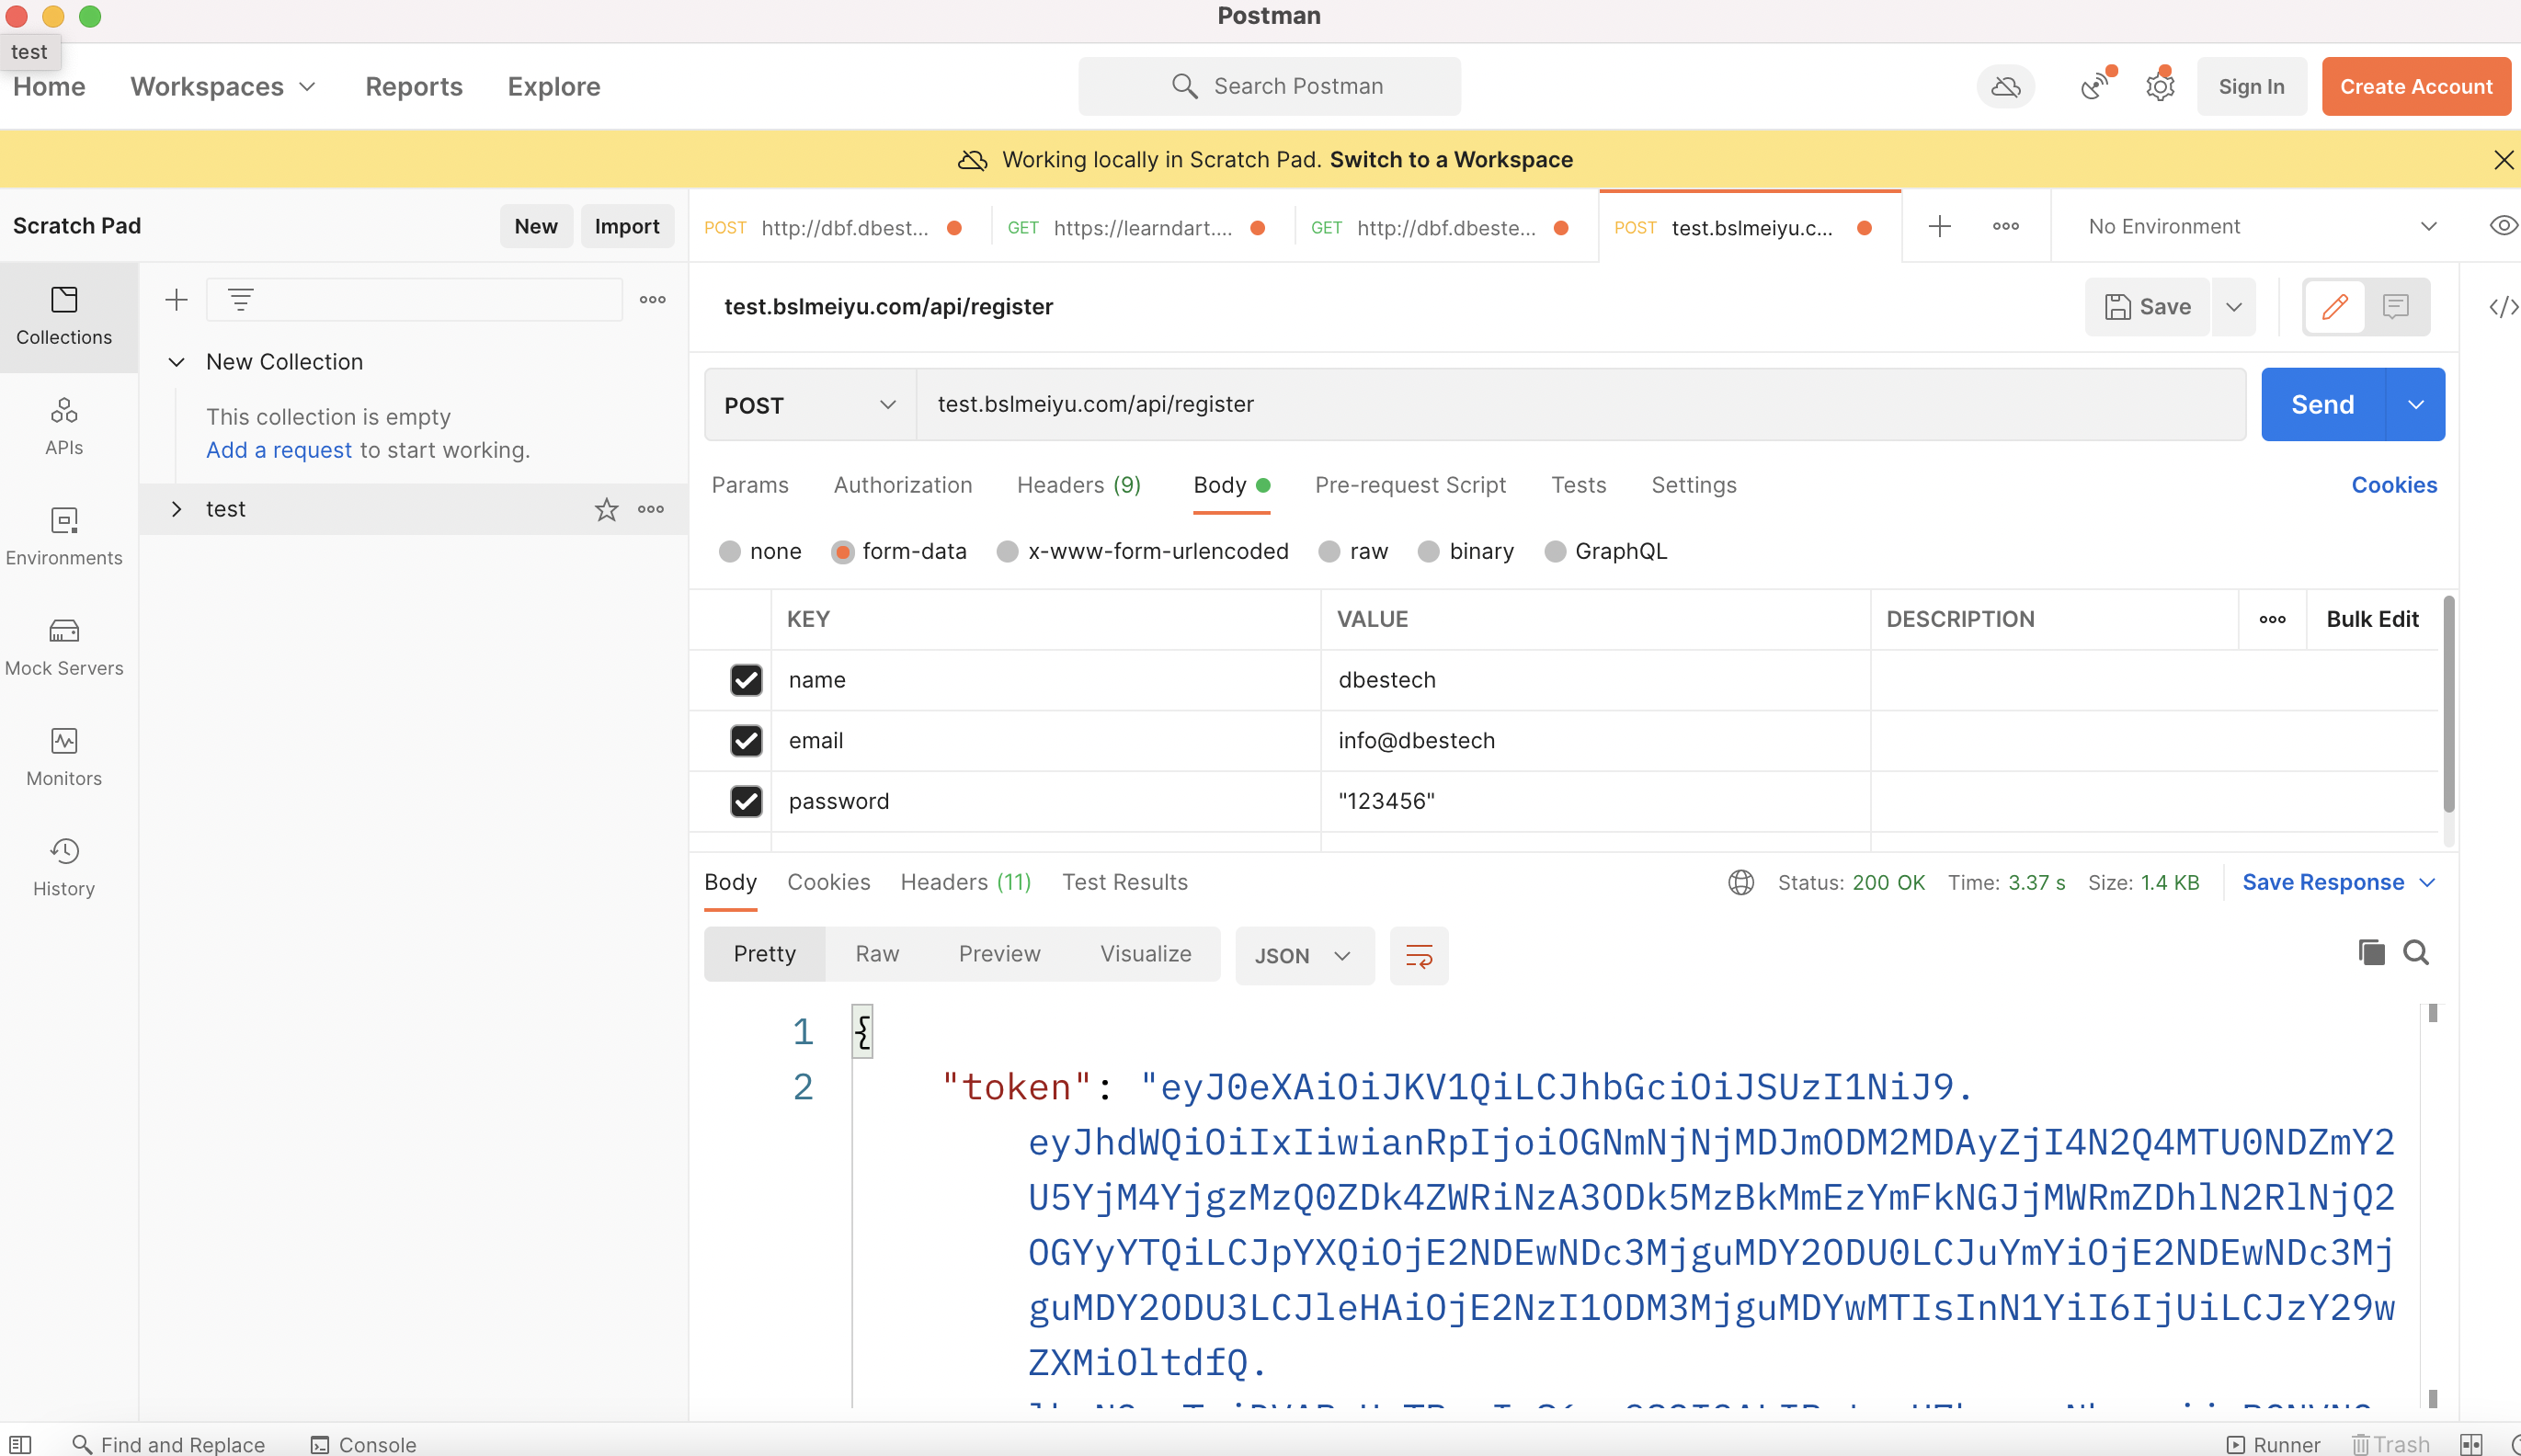
From the above picutre you can see that if we type in
test.bslmeiyu.com/api/registerIt returns token for us. This token is also saved in the database for the user. Every user will have their own unique token.
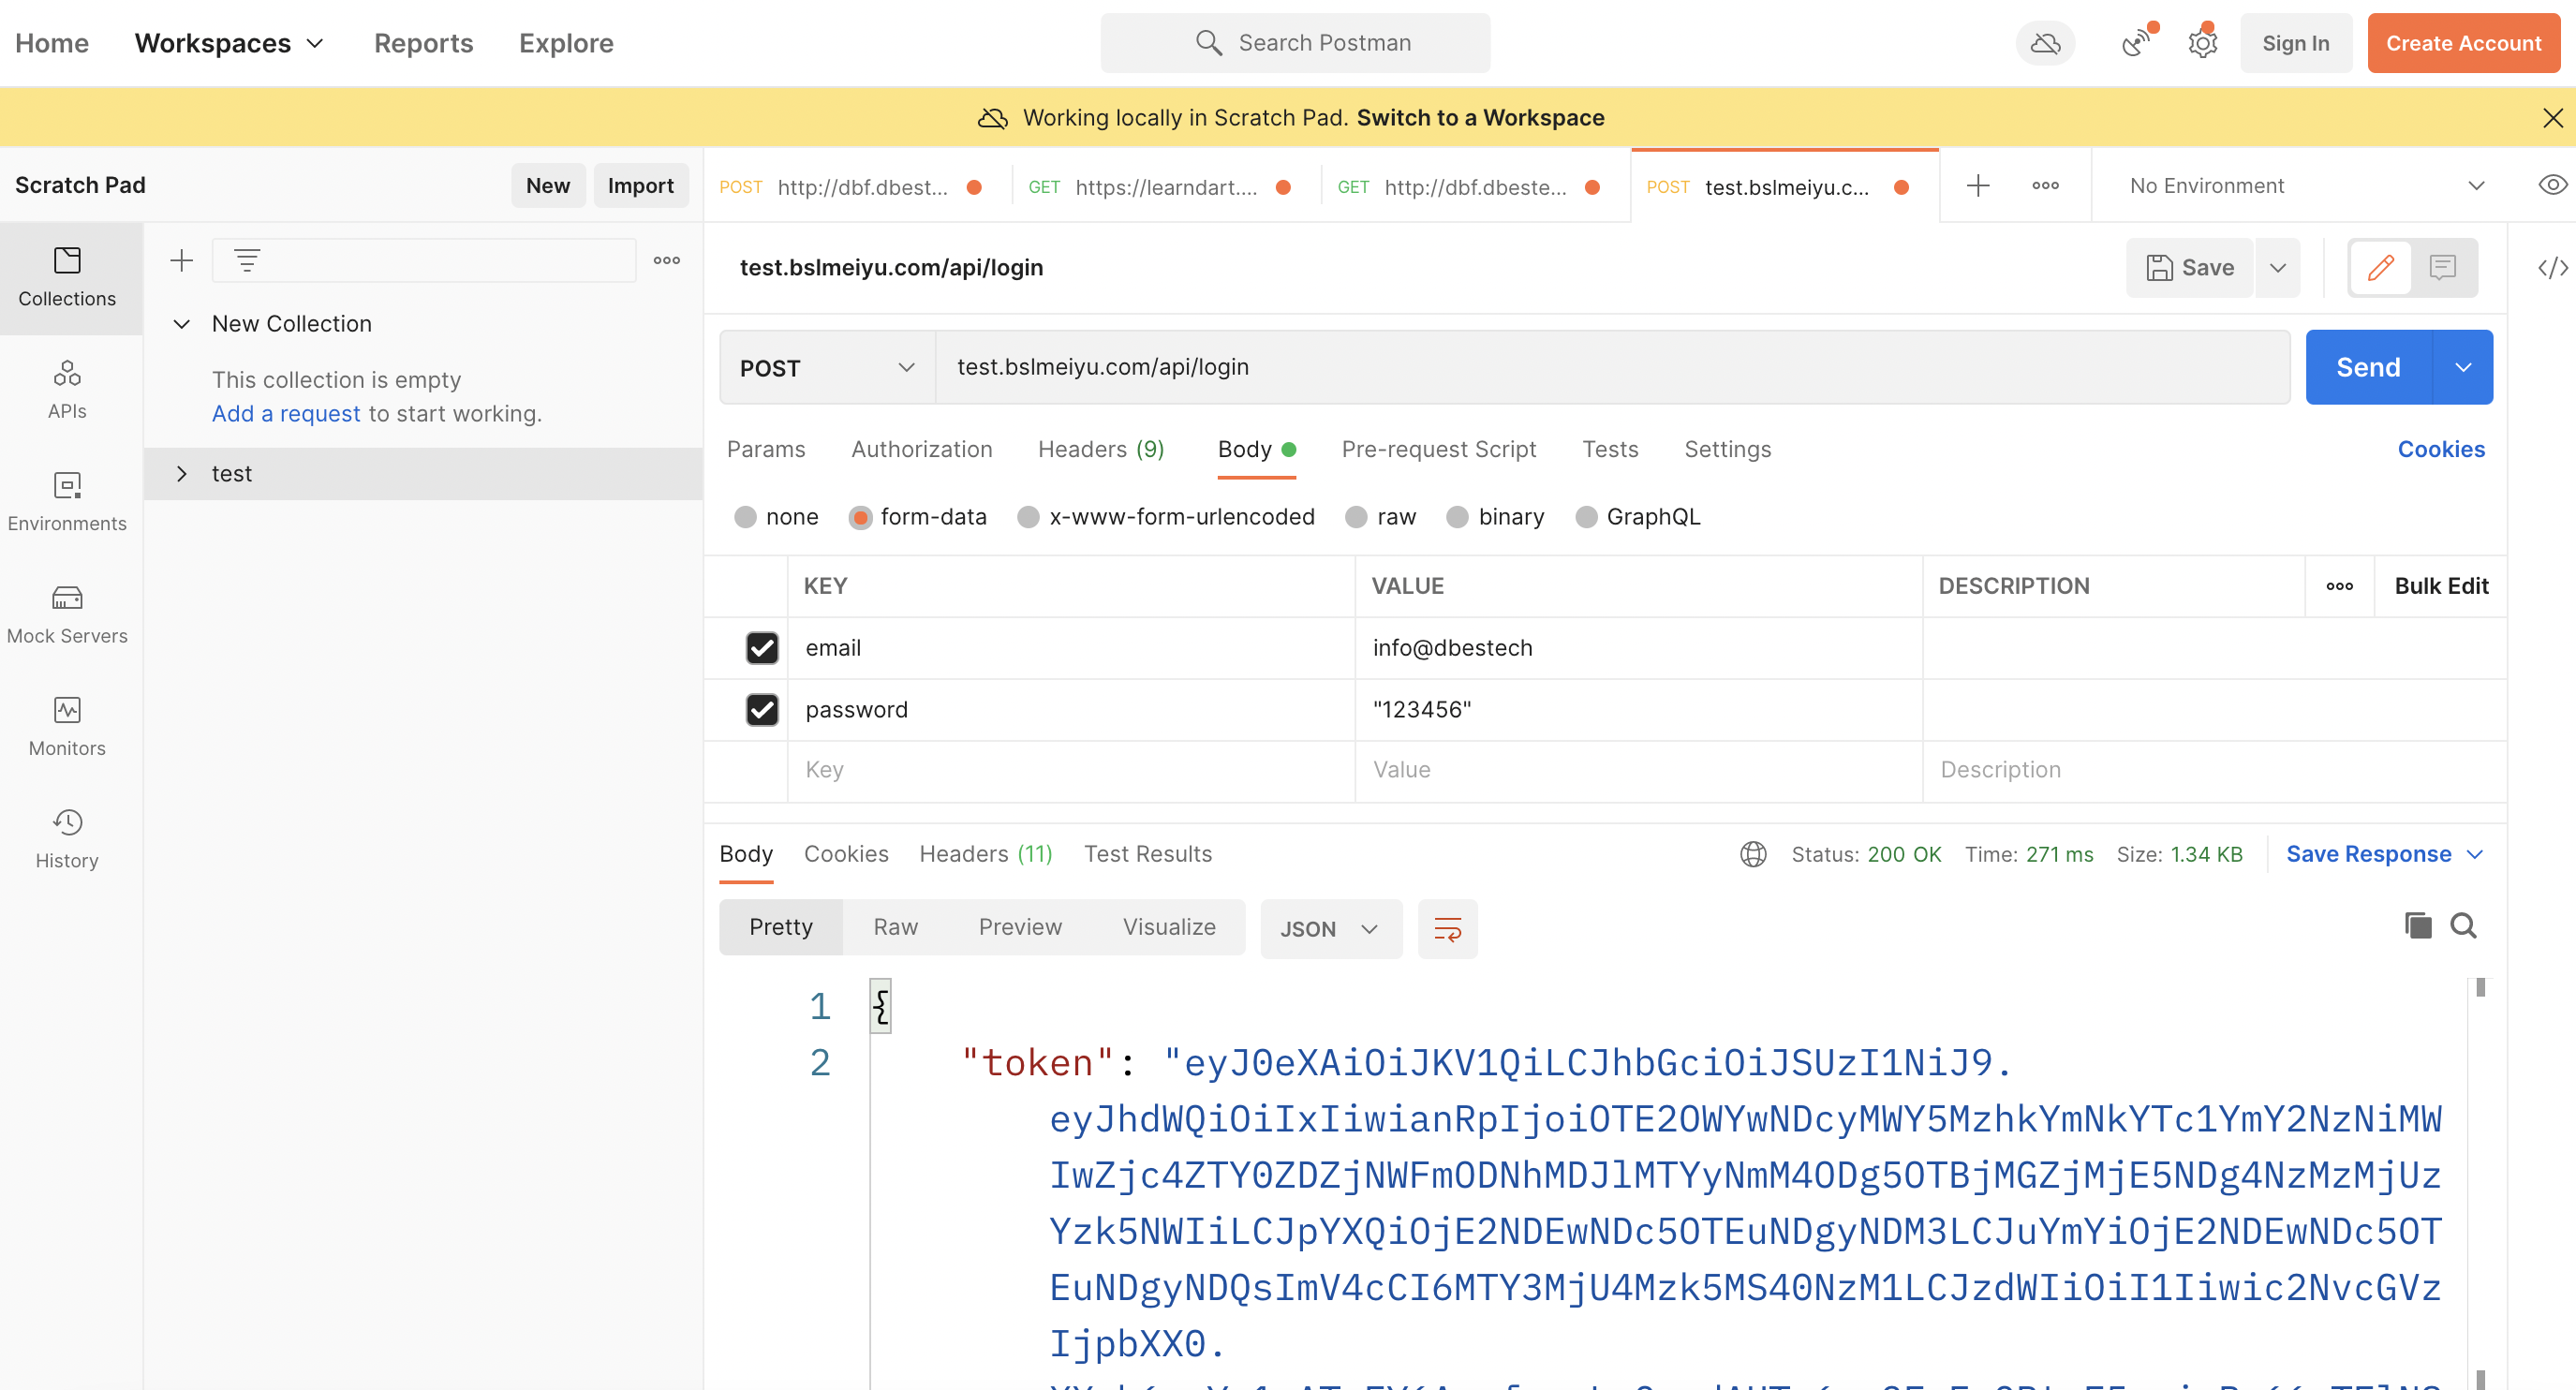
You can also retreive this token when you login
See the below photo, it returns token for us

In general, as you login to your app, you will save the token in your app to the local storage. And then you would be able to use for authentication in the app.
If you logout from the app, you would need to remove the token from app local storage.